Marble is a beautiful and luxurious material often used in home renovations. Whether you’re installing a new kitchen countertop or adding decorative elements to your bathroom, drilling into marble may seem like a daunting task. You might be worried about cracking the delicate surface or creating a messy hole that ruins the overall aesthetics.
But fear not! With the right tools and techniques, drilling into marble can be a breeze. In this blog post, we will explore the different types of drill bits specifically designed for marble, as well as provide tips on how to drill into marble without cracking it. So, grab your drill and let’s dive into the world of marble drilling!
Keywords: How do you drill into marble without cracking it?, How do you make a big hole in marble?, Is TX star the same as Torx?, What do I do if I cut the hole too big for my kitchen sink?, How do you cut a large hole in granite?, How do you widen a hole in concrete?, What type of drill bit do you use when drilling on marble?
What Type of Drill Bit Should You Use for Drilling on Marble?
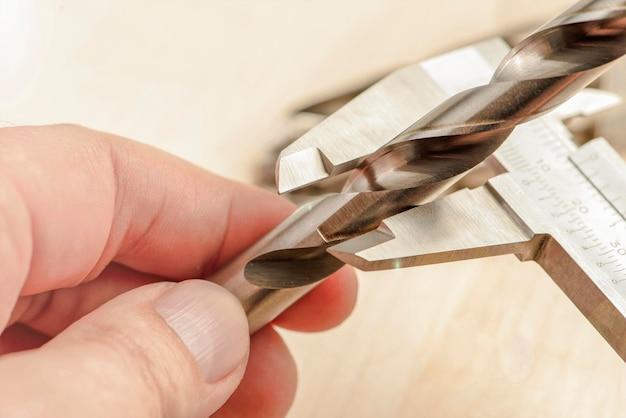
When it comes to drilling on marble, you need to choose the right type of drill bit for the job. While marble may look smooth and delicate, it’s actually a tough and dense material that requires some special treatment. So, without further ado, let’s dive into the best drill bits to use when working with marble.
Diamond-Tipped Drill Bits: A Marble Driller’s Best Friend
If you’re looking for the crème de la crème of drill bits for marble, look no further than diamond-tipped drill bits. Just like a James Bond-esque agent, these drill bits are suave, sophisticated, and highly effective. With their tough diamond tips, they can effortlessly cut through the densest of marbles, leaving a clean and precise hole in their wake.
Carbide-Tipped Drill Bits: The Reliable Sidekick
If diamond-tipped drill bits are the James Bond of the drilling world, then carbide-tipped drill bits are their trusty sidekick. These drill bits have carbide tips that are strong enough to withstand the hardness of marble, but they do lack the finesse of their diamond-tipped counterparts. Nonetheless, they are a reliable and affordable option that can get the job done.
Tungsten Carbide Drill Bits: The Underdog
In the world of drill bits, the tungsten carbide drill bit is often overlooked, but it shouldn’t be underestimated. With its tough tungsten carbide tip, this bit can tackle marble with relative ease. While it may not have the same finesse as diamond-tipped bits, it is a durable and cost-effective option that should not be overlooked.
Tips for Successful Drilling on Marble
-
Start Slow: Marble is not an easy material to drill through, so take your time and start with a slow drilling speed. This will help prevent the bit from overheating and ensure cleaner, more precise holes.
-
Use Water as Lubrication: Just like a refreshing drink on a hot summer day, water can be your best friend when drilling on marble. It acts as a coolant, keeping the drill bit and marble cool, and also helps to flush away debris. So, don’t forget to keep a spray bottle handy!
-
Gradually Increase Speed: Once you’ve pierced the surface of the marble, you can gradually increase the drilling speed. This will help to maintain a steady and controlled drilling process.
-
Be Gentle: Marble is delicate, so don’t apply excessive pressure while drilling. Let the drill bit do the work, and avoid pushing too hard to prevent any unnecessary damage to your precious marble.
-
Safety First: Last but not least, always prioritize safety when drilling on marble. Wear protective glasses to shield your eyes from flying debris and use a sturdy clamp or vice to secure the marble piece in place.
So there you have it, my friend. Now you know which drill bits to choose when taking on marble. Remember, whether you opt for the elegant diamond-tipped bit, the reliable carbide-tipped option, or the resilient tungsten carbide survivor, the key is to take it slow, use water as your trusty sidekick, and drill with precision. Happy drilling, and may your marble projects be a hole-in-one!
FAQ: Common Questions About Drilling on Marble
Marble, the luxurious and elegant natural stone, adds beauty and sophistication to any space. However, drilling into marble requires careful consideration to avoid any mishaps or damage. In this FAQ-style guide, we will answer some of the most frequently asked questions about drilling on marble. So grab your drill and let’s dive in!
How do you drill into marble without cracking it
Drilling into marble requires finesse to prevent those dreaded cracks. Here’s how you can do it:
-
Choose the right drill bit: To drill into marble, opt for a diamond-tipped or carbide drill bit. These specialized bits are designed to handle the hardness of marble without causing any cracks.
-
Mark your drilling spot: Use a pencil or masking tape to mark the exact spot where you want to drill. This will prevent your drill bit from slipping and scratching the surface.
-
Start slow and steady: Begin drilling at a low speed to create a small indentation on the marble surface. This will act as a guide for your drill bit and prevent it from wandering off.
-
Apply gentle pressure: As you drill, apply a steady and gentle pressure. Let the drill bit do the work, and avoid forcing it into the marble. Too much pressure can lead to cracks.
-
Keep it cool: To prevent overheating, periodically dip the drill bit into water or use a coolant spray. This will help prolong the lifespan of your drill bit and prevent damage to the marble.
How do you make a big hole in marble
Sometimes, a regular-sized hole just won’t cut it. If you need to make a bigger hole in marble, follow these steps:
-
Choose the right tool: Instead of a drill, you’ll need a diamond hole saw or a diamond core bit for creating larger holes in marble. These tools are specifically designed to tackle the job.
-
Mark the hole: Use a pencil or masking tape to mark the center of the desired hole. Double-check your measurements to ensure accuracy.
-
Secure the marble: Place a piece of scrap wood underneath the marble to prevent any chipping or cracking. This also helps stabilize the surface during drilling.
-
Start slow: Begin drilling at a low speed to create a small groove or pilot hole. This will guide your hole saw or core bit as you continue drilling.
-
Increase the speed: Once the pilot hole is established, gradually increase the drill speed. Be patient and maintain a steady hand throughout the process.
-
Keep it cool: Similar to drilling regular holes, remember to keep the area cool by frequently dipping the hole saw or core bit in water or using a coolant spray.
Is TX star the same as Torx
Ah, the confusing world of drill bits and screw heads! While “TX star” might sound similar to “Torx,” they are not the same. Let’s shed some light on this matter:
-
Torx: Torx refers to a type of screw head with a star-shaped pattern. It is commonly used in various applications, including power tools, automotive engineering, and electronics. Torx bits are designed to fit securely, reducing the chances of slipping and stripping screws.
-
TX star: TX star is essentially a shorthand way of referring to Torx screws. The “TX” stands for “Torx” and indicates the type of screw head you’re dealing with.
In summary, they may have slightly different names, but “TX star” and “Torx” are essentially the same thing. So next time you encounter these star-patterned screw heads, you’ll know what they’re all about!
What do I do if I cut the hole too big for my kitchen sink
Oops! Accidents happen, and sometimes those holes turn out a tad larger than intended. But don’t worry, all is not lost. Here’s what you can do:
-
Evaluate the damage: Assess the size of the hole and determine if it can be fixed using a larger sink flange or a decorative cover plate.
-
Larger sink flange: If the hole is only slightly oversized, you can purchase a larger sink flange. This will cover the extra space and ensure a snug fit for your kitchen sink.
-
Decorative cover plate: In the case of a significantly larger hole, consider using a decorative cover plate. These plates are specifically designed to conceal and beautify oversized cutouts.
Remember, these solutions may vary depending on the specific type and brand of kitchen sink you have, so be sure to consult the manufacturer’s guidelines.
How do you cut a large hole in granite
Granite, another stunning natural stone, requires special considerations when cutting large holes. Follow these steps for a successful endeavor:
-
Gather the right tools: To cut a large hole in granite, you will need a diamond hole saw or a diamond core bit designed explicitly for granite cutting.
-
Mark the hole: Use a pencil or masking tape to carefully mark the center of the hole you wish to cut. Take your time to ensure precise alignment.
-
Secure the granite: Place a sturdy piece of plywood beneath the granite to prevent any chipping or cracking. This will also provide stability during the cutting process.
-
Start drilling: Begin by creating a pilot hole using a small diamond-tipped drill bit. This will help guide your larger hole saw or core bit smoothly.
-
Increase the size: Gradually work your way up to the desired hole size by using progressively larger diamond hole saws or core bits. Take breaks to avoid any overheating.
-
Clean up: Once you have finished cutting the hole, remove any debris and gently sand down any rough edges using fine-grit sandpaper.
How do you widen a hole in concrete
When it comes to widening a hole in concrete, a few simple steps can save you from frustration. Here’s what you need to do:
-
Assess the situation: Determine the size by which you need to enlarge the hole. Ensure that the concrete structure can handle the modification without compromising its integrity.
-
Prepare the right tools: You’ll need a masonry drill bit and a hammer drill capable of handling the concrete’s toughness. Additionally, have a chisel and a heavy-duty vacuum on hand.
-
Create a guide: Mark the outline of the desired larger hole using a pencil or masking tape. This will serve as a guide as you drill and chisel.
-
Drill new holes: Begin by drilling a series of closely-spaced holes along the inner perimeter of the marked outline. These holes should be deep enough to accommodate the chisel.
-
Chisel away: With your chisel positioned at an angle, gently tap it into the drilled holes, chipping away the excess concrete. Take your time and work your way around the outline until the hole reaches the desired size.
-
Clean up: Once you’ve widened the hole, use a heavy-duty vacuum to remove any debris and dust created during the process. This will ensure a clean and secure surface for further work.
What type of drill bit do you use when drilling on marble
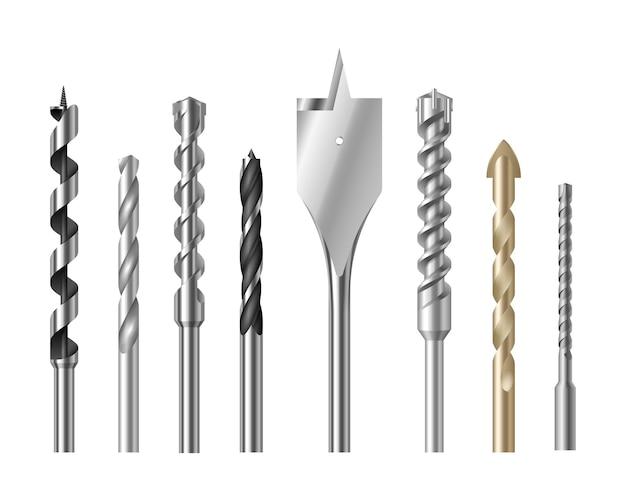
Choosing the right drill bit is essential when drilling on marble. Here are the types of drill bits commonly recommended for marble drilling:
-
Diamond-tipped drill bit: Diamond-tipped drill bits are specifically designed for drilling into hard materials like marble. The diamond coating helps to cut through the stone, ensuring precision and preventing cracking.
-
Carbide drill bit: Carbide drill bits are another popular choice for drilling marble. These bits are made from a combination of tungsten carbide and cobalt, allowing for efficient drilling without causing damage.
Both diamond-tipped and carbide drill bits are available in various sizes to accommodate different hole diameters. Be sure to choose a bit that matches the size of hole you require.
Congratulations! You’ve learned all the tips and tricks for successfully drilling into marble. From preventing cracks to widening holes, you’re now equipped with the knowledge to tackle any marble drilling project. Remember to choose the right tools, take your time, and keep your sense of humor intact. Happy drilling, and may your marble projects shine bright like a diamond!