Surface roughness plays a critical role in determining the functionality and quality of various materials and components. Whether it’s the smoothness of a car’s body, the precision of a microchip, or the performance of a surgical instrument, surface roughness matters. But how do we measure and quantify it? What are the units used to describe surface roughness? In this blog post, we will explore the fascinating world of surface roughness and delve into the various units and parameters used to characterize it.
From Ra and Rz to RT and N7, understanding the different surface roughness units can be a bit overwhelming. However, armed with knowledge about these units, you will gain a deeper understanding of surface roughness and be better equipped to evaluate and communicate surface finish specifications.
So, if you’re curious about the world of surface roughness and want to learn more about the units used to measure it, keep reading! We will dive into the details and answer common questions like how surface roughness is measured, the limitations of microscopic inspection, and how to interpret surface finish symbols. Happy exploring!

What are the Units of Surface Roughness?
Surface roughness is like the personality of a material – it’s what gives it character. But if we want to measure and compare this roughness, we need some units. So, what are the units of surface roughness? Let’s dive into the rough and tumble world of roughness units!
The Ra and Rz Showdown
When it comes to surface roughness, there are two heavyweight champions in the ring: Ra and Rz. Ra, also known as average roughness, measures the average distance between the peaks and valleys on a surface. It’s like measuring the average height difference between the peaks and valleys on a roller coaster ride – not too shabby!
On the other hand, we have Rz, which stands for mean peak-to-valley height. Rz measures the vertical distance between the highest peak and lowest valley within a sampling length. It’s like finding the tallest and deepest points on a roller coaster – now that’s some impressive data!
Microns: Small but Mighty
Hold on to your seats, folks, because we’re about to enter the microscopic world of surface roughness units. The most common unit for expressing surface roughness is the micron, symbolized by the Greek letter μ. Don’t be fooled by its small size, though – microns pack a powerful punch when it comes to precision measurements.
So, when you see a surface roughness value expressed in microns, imagine a tiny world where even the tiniest imperfections matter. It’s like zooming in on a roller coaster and realizing that every bump and groove can be measured with incredible accuracy. Mind-blowing, isn’t it?
RMS: Root Mean Square
If you prefer your units to have a touch of mathematical elegance, then RMS (Root Mean Square) is here to fulfill your desire. RMS is a statistical measure that calculates the square root of the average of squared roughness values. What a mouthful, right? But fear not, because RMS is a reliable way to express surface roughness in a single value.
Think of RMS like the average speed of a roller coaster. The roller coaster goes up and down, speeds up and slows down, but at the end of the ride, you get a single value that represents the overall experience. It’s like capturing the essence of roughness in one neat little package.
The Gritty Truth: Rz depth in microinches
Now, in the spirit of inclusivity, let’s not forget about our friends across the pond who like to measure roughness in microinches. One microinch is equal to one millionth of an inch. So while we’re talking about tiny imperfections, our American counterparts have their own way of expressing roughness depth.
If we convert Rz from microns to microinches, it’s like translating the language of roughness. It’s like telling the roller coaster story in a slightly different dialect. So, whether you prefer microns or microinches, the roughness language is spoken fluently worldwide.
Wrapping Up the Roughness Rumble
And there you have it – a whirlwind tour of the units of surface roughness. We’ve explored Ra and Rz, dabbled in microns and microinches, and even uncovered the mathematical elegance of RMS. So the next time you come across a rough surface, remember the hidden world of roughness units that lies beneath the surface. It’s a wild ride you won’t want to miss!

FAQ: What are the units of surface roughness?
Welcome to our comprehensive FAQ guide on surface roughness and its units. We’ve compiled a list of the most common questions people have about this topic and have provided answers in an engaging and informative manner. So, without further ado, let’s dive right in!
How is surface roughness measured
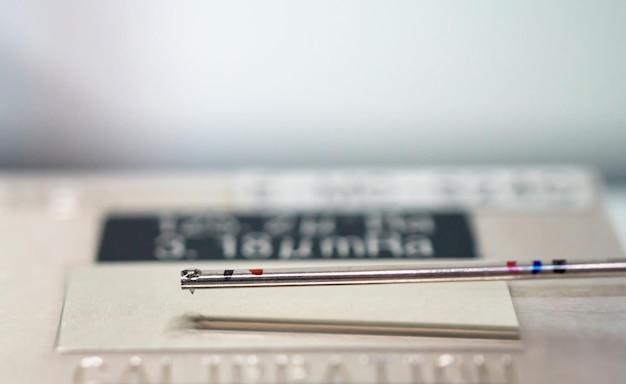
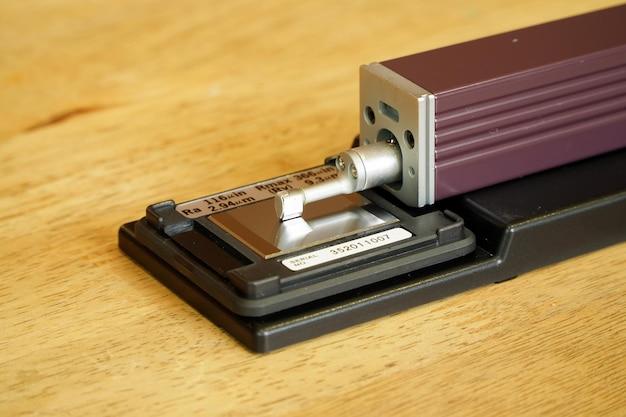
Surface roughness is typically measured using various instruments, such as profilometers, which analyze the texture of a surface. These instruments determine parameters such as Ra, Rt, and Rz (note: These are the most common surface roughness units). They measure the peaks and valleys of a surface to quantify its roughness at a micro-level. So, if you ever wondered how manufacturers accurately determine the roughness of a surface, these instruments play a crucial role!
What is RA RT RZ
RA, RT, and RZ are different surface roughness units extensively used to quantify and express the irregularities of a surface. RA is the Arithmetic Average Roughness, which provides an average measurement of the vertical deviations from the mean line. RT, known as Total Roughness, measures the vertical distance between the highest peak and the lowest valley within a given evaluation length. RZ, on the other hand, stands for Mean Roughness Depth, representing the average distance between the highest peak and the lowest valley within five sampling lengths. These units help ensure consistency in communicating surface roughness specifications.
What is the limitation of microscopic inspection to check surface
While microscopic inspection can provide valuable insights into surface roughness, it does have some limitations. One significant limitation is that microscopic inspection struggles to capture the entire surface area, often only providing a partial view. Additionally, certain surface irregularities may be too minute or challenging to detect using conventional microscopes. However, advancements in technology are continuously improving microscopic inspection techniques, offering more accurate and comprehensive surface analysis.
How do you insert a surface finish symbol in Excel
To insert a surface finish symbol in Excel, you can utilize the “Symbol” feature. First, click on the cell where you want to insert the symbol. Then, go to the “Insert” tab and select “Symbol” from the dropdown menu. A dialog box will appear, allowing you to choose from a wide range of symbols. Find the symbol that represents the desired surface finish and then simply click “Insert.” Voila! You’ve successfully added a surface finish symbol to your Excel sheet.
What do surface finish symbols mean
Surface finish symbols serve as a visual representation of the desired or specified surface texture characteristics. These symbols communicate vital information about parameters such as roughness, waviness, lay, and more. They help manufacturers understand the intended surface finish, enabling them to meet the required specifications. So, the next time you come across one of these symbols, take a moment to decode its meaning and appreciate the precision it conveys.
What Ra is mirror finish
A mirror finish refers to a surface that’s polished to a high level of smoothness, displaying a near-perfect reflection. Typically, the surface roughness value, Ra, for a mirror finish ranges between 0.01 and 0.02 micrometers. So, if you’re aiming for a flawless reflective surface, keep Ra within this range, and you’ll be able to see your reflection as clear as day!
What does a 125 surface finish mean
When the surface finish is specified as “125,” it refers to the Arithmetic Average Roughness value, Ra, measured in microinches. This value indicates the average height of surface irregularities in microinches. So, if you need to assess a surface with this particular finish, remember that it represents an Ra value of 125 microinches.
How do I add a surface finish in Creo
If you’re using Creo for your design and engineering needs, adding a surface finish is a breeze. Simply follow these steps:
- Open your Creo model and go to the desired drawing.
- Click on the “Appearance” tab in the ribbon.
- Select the surface or faces you want to apply the finish to.
- In the “Material and Finish” section, click on the “Finish” dropdown menu.
- Choose the appropriate surface finish option from the available list.
- Voila! Your surface finish is now added to your Creo model.
What do you mean by geometrical surface
A geometrical surface refers to a mathematical representation of an object’s external or internal boundary, often created through computer-aided design (CAD) software. It defines the shape, dimensions, and features of an object, enabling precise manufacturing and engineering. Geometrical surfaces play a vital role in various industries, ensuring accuracy and consistency in product development processes.
What is the general instrument cut off for majority engineering
The general instrument cut off refers to the threshold value or limit that determines which surface irregularities are significant enough to be measured by an instrument. For the majority of engineering applications, the cut off is often considered to be 0.8 millimeters. Any irregularities below this threshold are generally not considered in the surface roughness analysis. This cut off helps focus on the essential aspects of surface quality that directly impact performance without being overly concerned with minor deviations.
What is N7 surface finish
The N7 surface finish is a common specification used to denote the maximum allowable surface roughness in various applications. It indicates that the surface should have an Arithmetic Average Roughness, Ra, not exceeding 63 microinches. This finish offers a moderately smooth surface and is often employed in applications where a balance between cost and performance is desired.
How do I create a custom drawing symbol in Creo
To create a custom drawing symbol in Creo, follow these simple steps:
- Open your Creo model and navigate to the desired drawing.
- Click on the “Annotate” tab in the ribbon.
- Select the “Symbol” option from the dropdown menu.
- In the symbol dialog box, choose “Custom Symbol.”
- Design your custom symbol using the available tools and options.
- Once your custom symbol is ready, save it.
- You can now easily insert your custom drawing symbol in any Creo drawing by selecting it from the symbol library.
How do I know what surface finish I have
Determining the surface finish can be done by utilizing surface roughness measuring instruments such as profilometers or by referencing the specifications provided by the manufacturer. By using such instruments, you can obtain precise measurements and values for parameters like Ra, Rt, or Rz, which help you identify the surface finish accurately. Additionally, referencing manufacturer specifications ensures that the surface finish meets the required standards. So, whether you prefer to measure it yourself or rely on manufacturer information, determining the surface finish is crucial for quality control and ensuring the desired surface characteristics are achieved.
We hope this FAQ guide has answered your burning questions about surface roughness and its various units. From understanding how to measure surface roughness to locating the perfect symbol for your needs, we’ve covered it all. So, next time you encounter those mysterious surface finish symbols, you’ll have the knowledge to decipher their meaning and appreciate the art of surface quality evaluation. Stay tuned for more informative and engaging content related to surface roughness and beyond!
