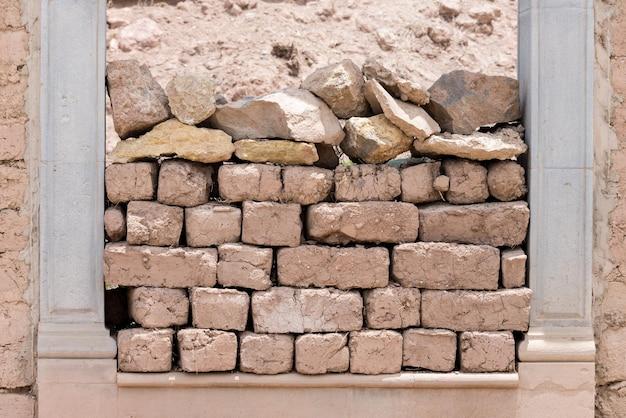
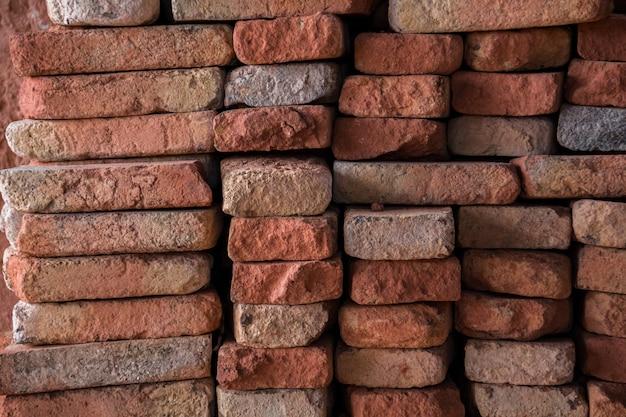
Welcome to our blog post on the fascinating topic of waterproofing mud bricks! In today’s construction landscape, the demand for sustainable and eco-friendly building materials is constantly growing. Mud bricks, also known as adobe bricks, have emerged as a popular choice due to their low cost, availability, and thermal properties. But how do we ensure that these bricks withstand the test of time and remain durable even in wet conditions?
In this article, we will explore various techniques used to make mud bricks and delve into the process of waterproofing them. We will also address common questions such as the number of bricks required for different projects, the waterproofing capabilities of adobe houses, and tips on cutting and shaping adobe bricks. So, whether you’re a DIY enthusiast or a professional builder, this guide will provide you with valuable insights and practical tips to create long-lasting mud brick structures.
Let’s jump right in and discover the secrets to waterproofing mud bricks in this comprehensive guide!
How to Keep Your Mud Bricks Dry and Fancy
Understanding the Importance of Waterproofing
You’ve built your dream house out of mud bricks, and now you’re wondering how to protect them from getting all wet and mushy when it rains. Fear not, for I have just the solution for you. Waterproofing your mud bricks is crucial to ensure their longevity and structural integrity.
1. All Hail the Mighty Sealant
To keep your mud bricks dry and fancy, one of the easiest and most effective methods is using a high-quality sealant. Think of it as a superhero cape for your bricks, protecting them from the evil clutches of water damage. Apply the sealant evenly across the surface of your bricks, allowing it to penetrate and create a protective barrier.
2. The Power of Liquid Membrane
If you’re looking for a more advanced option, liquid membrane waterproofing is your go-to choice. This superhero method involves applying a liquid membrane over the mud bricks, forming a flexible and impenetrable shield. Just like a trusty shield protects a warrior in battle, the liquid membrane shields your bricks from the rain.
3. The Magic of Chemical Additives
Sometimes mud bricks need a little extra magic to keep them dry. That’s where the power of chemical additives comes into play. These marvelous substances can be added to the mud mixture before brick-making, making the bricks themselves water-resistant from the inside out. It’s like giving your bricks a secret power only they possess.
4. Embrace the Art of Sloping and Overhangs
Who said architecture couldn’t be fancy and functional at the same time? By incorporating sloping and overhangs into your design, you can divert rainwater away from your precious mud bricks. It’s like crafting an elegant hat for your house, redirecting raindrops like a true fashion icon.
5. Don’t Forget the Foundation
Just like a strong foundation is vital for a successful relationship, it’s equally important for your mud brick house. Ensuring your foundation is properly waterproofed will prevent any water from seeping into your bricks from below. It’s like building a moat around your house, protecting it from the water invaders.
Keeping your mud bricks dry and protected doesn’t have to be a burdensome task. With the right approach and a touch of creativity, you can safeguard your bricks from rainy days and enjoy your fancy mud brick house for years to come. So, go forth, my friends, and waterproof those bricks like a true master of the mud!
Frequently Asked Questions about Waterproofing Mud Bricks
What are the techniques used to make mud bricks
To make mud bricks, you can follow these techniques:
-
Mixing mud and water: Start by combining soil, clay, sand, and water in the right proportions. This ensures a sturdy and cohesive mud mixture.
-
Molding the bricks: Shape the mud mixture into brick forms using wooden or metal molds. Allow them to dry and harden naturally.
-
Curing the bricks: After drying, give the bricks enough time to cure. This can take several weeks, depending on the climate and weather conditions.
How many blocks can build a 5-bedroom bungalow
Ah, the age-old question! The number of blocks required to construct a 5-bedroom bungalow depends on various factors, like its size, design, and layout. A rough estimate would be around 10,000 to 20,000 blocks. However, it’s always best to consult with an architect or contractor to get an accurate estimate tailored to your specific plans.
Are adobe houses waterproof
While adobe houses are known for their durability and sustainability, they aren’t inherently waterproof. Adobe bricks are porous and can absorb water if not properly treated. However, there are effective waterproofing techniques available that can make adobe houses highly resistant to water damage. We’ll explore those techniques further in this article.
How many blocks can build a fence 50 by 100
Building a fence is a fantastic way to spruce up your space. For a 50 by 100 feet fence, you’ll need to consider the desired height and the spacing between the blocks. On average, you may require around 200 to 300 blocks for a 50 by 100 feet fence, assuming a standard height. Again, it’s best to consult with a professional for accurate measurements and advice tailored to your specific project.
How many bags of cement do I need for 100 blocks
Ah, the trusty cement bags! To construct 100 blocks, you’ll typically need around 8 to 10 bags of cement. Remember, this estimate can vary depending on the size and thickness of the blocks, as well as the specific cement-to-block ratio you use. It’s always wise to consult a local expert who can guide you based on the availability and characteristics of cement in your area.
How many bricks make one bag of cement
Bricks and cement go hand in hand like peanut butter and jelly, don’t they? On average, you can expect a bag of cement to be able to bond around 200 to 300 bricks together, depending on the size of the bricks and the mortar thickness. However, keep in mind that this estimate may change based on the specific brand of cement or any additional materials used in the process.
How do I cut in adobe bricks
Cutting adobe bricks might sound like a challenging task, but fear not! Here’s a simple technique you can try:
-
Measure and mark: Use a measuring tape and a pencil to mark the precise spot where you want to make the cut on the adobe brick.
-
Wet the brick: Before cutting, soak the area to be cut with water. This softens the brick, making it easier to work with.
-
Cutting: With a saw blade specifically designed for masonry work, carefully cut along the marked line.
-
Smooth the edges: Use sandpaper to smooth out any rough edges or imperfections left by the cutting process.
Remember, safety first! Always wear protective goggles, gloves, and a face mask to ensure your well-being while working with adobe bricks.
How do you waterproof mud bricks
Ah, the million-dollar question! Ensuring your mud bricks are waterproof involves several steps:
-
Additives: Consider incorporating additives into your mud mixture. Materials like cement, lime, or waterproofing agents can enhance the water-resistance of the bricks.
-
Sealing the surface: Applying a layer of sealant or waterproof coating on the outer surface of the bricks can immensely improve their resistance to water penetration.
-
Proper curing and maintenance: Give your mud bricks ample time to cure and harden. Additionally, regular maintenance, including reapplying sealants as needed, can help prolong their waterproofing properties.
Remember, it’s always crucial to test the effectiveness of your waterproofing efforts on a small sample of bricks before applying it to your entire project.
How do I make adobe bricks at home
Making adobe bricks at home can be a rewarding and earth-friendly experience. Here’s a simplified version of the process:
-
Materials: Gather soil, clay, sand, and water in appropriate ratios. Typically, a mixture of 30% clay, 70% sand, and additional silt or organic matter works well.
-
Mixing: Combine the materials thoroughly, either by hand or using a cement mixer, until you achieve a consistent and workable mud mixture.
-
Molding: Shape the mud mixture into brick forms using molds or by hand. You can experiment with different sizes and designs to suit your needs and preferences.
-
Drying and curing: Allow the bricks to dry naturally in a shaded area for several weeks, ensuring they are protected from rain and extreme weather conditions.
-
Optional additives: If desired, you can add stabilizers like cement, lime, or waterproofing agents to improve the durability and water-resistance of your adobe bricks.
Remember, patience is key during the drying and curing process. Once your bricks are ready, you’re one step closer to your DIY paradise!
How many bags of cement do I need for 100 hollow blocks
Hollow blocks, those clever creations! To make 100 hollow blocks, you’ll likely require around 7 to 9 bags of cement. However, keep in mind that this estimate may vary depending on factors such as the block size, cement composition, and desired strength. Don’t hesitate to seek guidance from professionals to determine the right quantities for your specific project.
Which cement is best for making bricks
Choosing the right cement for your brick-making endeavors is crucial. For most traditional brick-making methods, Portland cement is a popular choice. It’s known for its strength and compatibility with various aggregates. However, it’s essential to consider local availability, cost, and any regional specifications or requirements when selecting cement for your bricks. Consulting with local experts or suppliers will help you make an informed choice.
How do I create an adobe house for a school project
Ah, the nostalgic days of school projects! Creating an adobe house for your school project can be a fun and educational experience. Here’s a simplified guide to get you started:
-
Research: Learn about adobe houses, their history, and their unique features. This will help you design and construct an authentic representation.
-
Planning: Develop a sketch or blueprint of your adobe house. Consider factors like size, layout, and materials required.
-
Materials: Gather the necessary materials, including soil, clay, sand, water, and additional tools like molds, trowels, and buckets.
-
Brick-making: Follow the guidelines mentioned earlier to make adobe bricks. Create enough bricks to build your house, considering dimensions and architectural details.
-
Construction: Assemble the bricks using mortar made from the same mud mixture used for the bricks. Build the walls, leave spaces for doors and windows, and consider architectural elements like arches or niches if desired.
-
Finishing touches: Once the structure is complete, allow it to dry and harden. You can then paint or decorate the walls to add personality and bring your adobe house to life.
Remember, school projects are a wonderful way to unleash your creativity and learn new skills. Embrace this opportunity, and don’t be afraid to get your hands a little muddy!
And there you have it, an FAQ-style guide to waterproofing mud bricks! We hope these answers have shed some light on your burning questions and left you feeling confident and entertained. If you have any more inquiries or need further assistance, don’t hesitate to reach out. Happy brick-making and waterproofing!
Disclaimer: The information provided in this article is for informational purposes only. Always consult with professionals or experts for accurate advice and guidance tailored to your specific project.