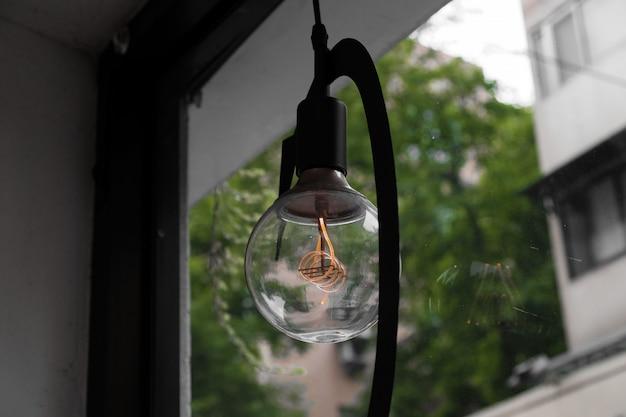
Outdoor lighting is a crucial element for any home or landscape. It not only enhances the aesthetic appeal but also provides safety and security. However, at times, these outdoor light fixtures can encounter issues that prevent them from functioning properly. Whether it’s a dimly lit pathway or a flickering deck light, troubleshooting the problem becomes essential to restore the functionality.
In this comprehensive guide, we’ll explore how to test an outdoor light fixture using a multimeter, a versatile tool that measures electrical voltage, current, and resistance. By learning the steps to perform these tests, you can diagnose problems such as power issues, short circuits, or faulty connections. So, if you’ve ever found yourself asking questions like “How do I know if my light fixture has power?” or “How do you test an outdoor light fixture with a multimeter?”, you’re in the right place. Let’s dive in and shed some light on these troubleshooting techniques.
This blog post will cover various methods to ensure that your outdoor light fixtures are working efficiently. You’ll discover how to turn on your outdoor lighting portfolio, identify and fix shorts in landscape lighting, and test 12 volt landscape lighting. We’ll focus on using a multimeter as a valuable tool to determine if your light fixtures have power and pinpoint any issues that need attention. By the end, you’ll have the knowledge and confidence to troubleshoot and resolve common problems that may arise with your outdoor lighting setup.
So, let’s embark on this illuminating journey and get those outdoor lights shining as bright as ever!
How to Test an Outdoor Light Fixture with a Multimeter
So, you’ve got yourself an outdoor light fixture, but something seems off. Maybe it’s not shining as brightly as it used to, or perhaps it’s not working at all. Whatever the case, it’s time to put your trusty multimeter to work and unravel the mystery. Don’t worry, testing an outdoor light fixture with a multimeter is easier than it sounds. Let’s dive right in!
Gather Your Tools
Before we embark on our troubleshooting journey, make sure you have your essentials by your side. Grab your multimeter, gloves (because safety first, my friend!), and a cup of steaming hot coffee (because, well, coffee fixes everything).
Turn Off the Power
Now, I know you’re pretty electrifying, but let’s not get too carried away. Safety is paramount, so before you start fiddling with wires, switch off the power to the outdoor light fixture. You don’t want any unexpected sparks turning your test session into a disco party.
Remove the Light Fixture and Expose the Wires
With the power off and your dancing shoes in the closet, it’s time to remove the outdoor light fixture gently. Unscrew any screws or bolts holding it in place and carefully disconnect the wires. Remember, patience is key here. Rushing might just lead you down a dark path of tangled wires and despair.
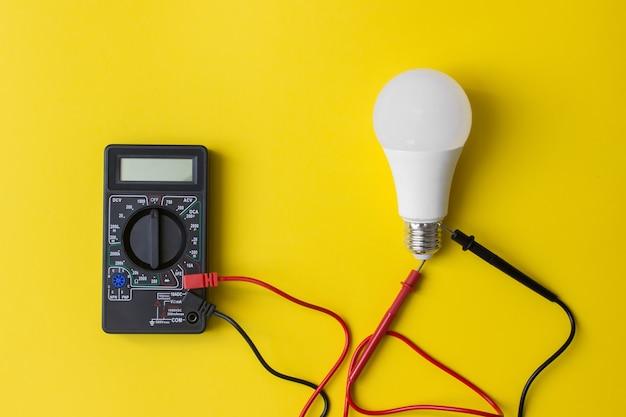
Set Your Multimeter to the Resistance Testing Mode
Now comes the part where your multimeter becomes the shining star of this testing extravaganza. Switch it to the resistance testing mode, indicated by a fancy symbol that looks like an arrow being crushed by a snake. Okay, maybe not that fancy, but you get the point.
Test the Wires
With the multimeter set up like a boss, it’s time to get down to business. Touch one probe to each wire to measure the resistance. If the reading you get is close to zero or shows continuity, congratulations! Your wires are in good shape, like a well-trained Olympic athlete.
Test Each Wire to Ground
Now, let’s introduce our wires to their good friend, Mr. Ground. Connect one probe of the multimeter to a known ground source (like a metal screw in the electrical box), and touch the other probe to each wire. If you get a reading close to zero or continuity, it means the wire is grounded and ready to light up your world.
Check the Socket
Not convinced that the wires are the culprits? It’s time to put the spotlight on the socket. Set your multimeter to the voltage testing mode, and carefully touch the probe to the metal contacts inside the socket. If you get a reading that matches the voltage your outdoor light fixture requires, the socket is shining bright like a diamond.
Consider the Bulb
Alright, Sherlock Holmes, if you’ve come this far and still haven’t solved the mystery, let’s turn our attention to the bulb. Unscrew it from the outdoor light fixture and give it a good look. If it’s blown or flickering like a disco ball, it’s time for a new one. Remember, bulbs have a lifespan too, just like moody teenagers.
Reassemble and Celebrate
With all the tests done, it’s time to put things back together. Reconnect the wires, secure the screws or bolts, and bask in the satisfaction of a job well done. Now invite your neighbors over for a barbecue party under the beautifully shining outdoor light fixture. You deserve it!
And there you have it, my friend! Testing an outdoor light fixture with a multimeter is no longer a daunting task. Remember, safety first, patience second, and a little bit of humor to keep things light. Now go forth and conquer the darkness with your newfound electrical expertise!
FAQ: How to Test an Outdoor Light Fixture with a Multimeter
How to Turn On Your Outdoor Lighting Portfolio
To turn on your outdoor lighting portfolio, follow these easy steps:
- Locate the outdoor lighting control panel. It’s usually found near the main entrance of your home or in a dedicated electrical box.
- Open the control panel and find the circuit breaker labeled “Outdoor Lighting.”
- Flip the switch to the “On” position.
- Give it a moment. Voila! Your outdoor lighting portfolio should now shine bright like a star!
How to Detect a Short in Landscape Lighting
Finding a short in your landscape lighting can be a real buzzkill. But fear not, we’ve got your back! Here’s what you need to do:
- Grab your trusty multimeter, a tool that measures electrical current.
- Turn off the power supply to your landscape lighting. Safety first!
- Disconnect the landscape lighting fixtures from the main power source.
- Set your multimeter to measure resistance (ohms).
- Connect the multimeter test leads to each end of the landscape lighting wire.
- If the multimeter reading is close to zero, congratulations! You’ve found the short circuit!
- Inspect the wire for any visible damage or exposed wiring that could be causing the short.
- Repair or replace the damaged wire and retest using the multimeter.
- Once everything’s shipshape, reconnect your landscape lighting and enjoy the illuminating ambiance!
How to Determine If Your Light Fixture Has Power
Curious to know if your light fixture is juiced up and ready to glow? Here’s the scoop:
- Confirm that your light switch is turned on. It may seem obvious, but hey, we’ve all had those “oh, right” moments.
- Check the circuit breaker for any signs of tripping. If it has tripped, reset it and see if your light fixture springs to life.
- If the switch is on and the circuit breaker looks fine, it’s time to wield your multimeter!
- Set your multimeter to measure AC voltage.
- Carefully remove the light fixture cover and expose the wires.
- Touch one multimeter probe to the black (hot) wire and the other probe to the white (neutral) wire.
- If the multimeter shows a voltage reading, hallelujah! Your light fixture has power.
- If you see no voltage reading, it’s time to channel your inner detective and investigate the power source or wiring connections.
How to Test 12 Volt Landscape Lighting
Testing your 12-volt landscape lighting is a breeze! Follow these simple steps:
- Confirm that your 12-volt power supply is working correctly. Check for any tripped circuit breakers or blown fuses.
- Turn off the power supply to your landscape lighting. Safety is our top priority here!
- Disconnect the landscape lighting fixtures from the main power source.
- Set your multimeter to measure DC voltage.
- Connect the multimeter test leads to the positive and negative terminals of your landscape lighting system.
- Read the multimeter: if it shows a 12-volt reading, kudos! Your landscape lighting is ready to shine.
- If the reading is zero, double-check your power supply and connections. There might be a hitch that needs fixing.
Why Your Landscaping Light May Not Work
Picture this: you’re ready to bask in the ethereal glow of your landscaping lights, but they refuse to cooperate. Here are a few potential culprits to consider:
- Faulty Wiring: Landscaping lights can be finicky, just like that one friend who brings the drama to every gathering. Check for loose, damaged, or disconnected wires. Reconnect or repair as necessary.
- Burned-Out Bulbs: Your landscaping lights work hard to illuminate your outdoor space, and sometimes their bulbs simply burn out. Replace any dim or dead bulbs with fresh ones and watch the magic happen.
- Dastardly Photocell: Photocells, those sneaky sensors that detect ambient light and control when your landscaping lights turn on and off, can become mischievous. Check if your photocell needs adjustment or replacement.
- Rebellious Timers: Timers are like the gatekeepers of your landscaping lights, responsible for their on and off times. Ensure your timer settings are accurate and that daylight saving time hasn’t thrown them off track.
- Gremlins: Okay, not actually gremlins, but sometimes the cause of your landscaping light woes remains a mystery. In such cases, it’s best to call a professional electrician who can work their magic and get your lights back in action.
With these troubleshooting tips, you’ll be able to tackle the most common issues that may be dimming your outdoor lighting experience. Remember, it’s all about keeping those lights shining bright and your outdoor space looking stunning!