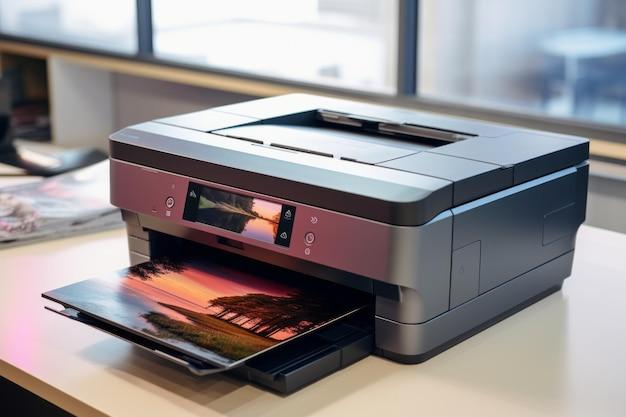
In today’s digital age, faxing may seem like an outdated concept, but it still plays a significant role in many industries. If you own an HP Photosmart 7520, you might be wondering how to set up the fax feature on this versatile all-in-one printer. Look no further! In this blog post, we’ll walk you through the step-by-step process of setting up fax on your HP Photosmart 7520, ensuring you can send and receive important documents seamlessly.
But before we delve into the nitty-gritty of setting up fax, let’s address a few common queries. Have you ever wondered if an all-in-one printer like the HP Photosmart 7520 can fax? And why do documents sometimes get stuck in the print queue? We’ll discuss those too, along with other frequently asked questions related to setting up the HP Photosmart 7520 printer and troubleshooting common issues.
So, grab your coffee, sit back, and let’s embark on this fax setup journey together! It’s time to unlock the faxing potential of your HP Photosmart 7520 and ensure you stay connected in the most convenient and efficient way possible.
How to Set Up Fax on HP Photosmart 7520
Fax may seem outdated in the age of digital communication, but there are still occasions when it comes in handy. Whether you need to send important documents or receive signed contracts, setting up fax on your HP Photosmart 7520 can save you time and effort. In this guide, we’ll walk you through the steps to get your fax up and running smoothly.
Checking the Basics
Before diving into the setup process, ensure that you have the necessary equipment and materials at your disposal. You’ll need an active telephone line, which you can connect to the “Line 1” or “Tel 1” port on the back of your printer. Keep in mind that fax requires an analog phone line, so if you have a digital phone service (like VoIP), you may need to consult your service provider for compatibility.
Configuring Fax Settings
Once you’ve checked the basics, it’s time to configure the fax settings on your HP Photosmart 7520. On the printer’s control panel, locate and press the “Fax” button. This will open the fax menu. From there, navigate to the “Setup” or “Settings” option and select it. Here, you’ll find various settings that you’ll need to customize according to your needs.
Entering Fax Header Information
To personalize your faxes, enter your fax header information. This includes details like your name, company name (if applicable), and fax number. By providing this information, your recipients will know who the fax is coming from and how to reach you. In the fax menu, navigate to the “Headers” or “Sender Information” option, and enter the required details.
Set Up Automatic Answering and Rings to Answer
To ensure you never miss an important fax, you’ll want to set up automatic answering and the number of rings to answer. In the fax menu, locate the “Auto Answer” or “Answer Mode” option and enable it. You’ll also need to specify the number of rings before the printer automatically answers the incoming fax. Typically, this is set to two or three rings, but you can adjust it according to your preferences.
Enable Fax Receive
Now that you have your fax settings configured, it’s time to enable fax receive mode. This mode allows your HP Photosmart 7520 to receive incoming faxes. In the fax menu, navigate to the “Receive Mode” or “Receive Options” option and select it. Choose the “Automatic” or “Fax/Tel” mode, depending on whether you want the printer to automatically receive faxes or if you want to manually switch between fax and telephone calls.
Test and Troubleshoot
To ensure that your fax setup is working correctly, it’s a good idea to send a test fax to a fax number you have access to. This way, you can verify that both sending and receiving functions are working as expected. If you encounter any issues, refer to the user manual or visit the HP support website for troubleshooting guidance.
With these simple steps, you’ll be up and running with fax on your HP Photosmart 7520 in no time. Now, go ahead and give a high-five to this not-so-old-school technology as it proves to be more relevant than ever in handling important documents efficiently.
FAQ: How do I Set Up Fax on HP Photosmart 7520?
Does an All-in-One Printer Fax
Yes, an all-in-one printer, like the HP Photosmart 7520, has the capability to fax. This means you can send and receive faxes directly from the printer, just like your very own high-tech messenger pigeon. It’s a fantastic feature that combines the convenience of a printer, scanner, and fax machine all in one sleek device. So, whether you need to fax important documents or want to embrace some good old-fashioned nostalgia, your HP Photosmart 7520 has got your back!
How do I Send a Fax from my HP Photosmart 7520
Sending a fax with your HP Photosmart 7520 is as easy as teaching a smartphone to take selfies. Here’s a step-by-step guide to get you faxing like a pro:
-
Load the document you want to fax into the automatic document feeder or place it on the scanner glass. This step is crucial, as sending a blank fax might make your recipient question your sanity.
-
On the printer’s control panel, locate the Fax button that resembles an old-school telephone. Go ahead and give it a satisfying press to bring up the Fax menu.
-
Once you’re in the Fax menu, select the “Send Now” option. It’s like hitting the “Send” button on an email, but with a touch of nostalgia.
-
Now, enter the recipient’s fax number using the numeric keypad on the printer’s control panel. Make sure you have the correct number, or else your fax might end up in the wrong hands, like your neighbor’s adorable poodle named Fluffy.
-
After entering the recipient’s fax number, hit the “Start” button. Your HP Photosmart 7520 will work its magic, scanning and sending your document through the wonderful world of fax technology. It’s as if your document is taking a thrilling roller coaster ride to its final destination.
-
Voila! Your fax has now been sent, and you can enjoy that satisfaction of a job well done. Just remember to wait for the confirmation message on the printer’s display to ensure that your fax reached its intended recipient.
Why do Documents Get Stuck in Print Queue
Ah, the notorious print queue – the place where documents go to have a little party while you wait impatiently for them to be printed. If you find your documents getting cozy in the print queue without ever making it to the printer, don’t worry, you’re not alone. Here are a few possible reasons why this might happen:
-
The printer is offline: Sometimes, printers decide to take a disco nap and go offline, leaving your poor documents stranded in the queue. Check your HP Photosmart 7520’s connection to make sure it’s awake and ready to rock.
-
Outdated or incompatible printer drivers: Just like a fancy car needs the right fuel, your printer needs the right drivers to function smoothly. If you’re still rocking those outdated printer drivers, it’s no wonder your documents are feeling a bit lost. Update those drivers, and your documents will be dancing their way out of the queue in no time.
-
Paper jams or printer errors: The print queue may be overflowing because your printer is having a little internal crisis. Paper jams, low ink, or any other printer error can cause documents to get stuck. Be there for your printer, troubleshoot the issues, and clear that queue like a true document hero!
How do I Set Up my HP Photosmart Printer
Setting up your HP Photosmart 7520 is easier than teaching a goldfish to do tricks! Just follow these simple steps, and you’ll be ready to unleash its printing prowess:
-
Unbox and prepare your printer: Remove your HP Photosmart 7520 from its box with the enthusiasm of a kid opening a birthday present. Make sure to remove all those protective tapes and packaging materials.
-
Connect the power: Find a cozy spot for your printer near an electrical outlet, plug in the power cable, and watch it come to life. Just like you after a cup of coffee in the morning.
-
Install ink cartridges: Open the printer’s ink cartridge access door and insert the ink cartridges with the grace of a ballerina. Follow the color codes and push them gently until you hear a satisfying click. Ink cartridges in place? Great!
-
Load paper: Pop open the input tray, adjust the paper guides to fit the paper size you’re using, and load a stack of paper. It’s like tucking your printer in with a warm blanket.
-
Connect to Wi-Fi: Press the wireless button on the printer’s control panel and select your Wi-Fi network from the list. If your printer starts dancing, don’t worry, it’s just celebrating the connection.
-
Install printer software: Grab your computer or smartphone and head over to the official HP website. Find the software and drivers section, locate your printer model, and download the appropriate software. Follow the on-screen instructions, and in no time, you’ll have the power of printing at your fingertips.
How do I Turn On my HP Photosmart 7520 Printer
Turning on your HP Photosmart 7520 is as easy as pressing a button (or two). Follow these simple steps, and your printer will be up and running like a cheetah on roller skates:
-
Locate the power button on the printer. It’s like finding the “on” switch for an eager puppy.
-
Give that power button a gentle press. You’ll see lights flashing, screens coming to life, and the sweet sound of your printer waking from its slumber.
-
If your printer has a touch screen display, you might need to tap or swipe the screen to get past any welcome messages or loading screens. It’s like granting your printer VIP access to the world of printing.
-
Ta-da! Your HP Photosmart 7520 is now powered on and ready for all your printing adventures. May it bring you crisp documents, vibrant photos, and the occasional chuckle.
How do I Enable HP Web Services
HP Web Services, huh? Sounds fancy, right? Well, enabling HP Web Services on your HP Photosmart 7520 is as easy as giving it a high-five. Follow these steps, and you’ll be unleashing the power of the internet on your printer:
-
On the printer’s control panel, hunt down the HP ePrint button. It’s like finding that secret button on an elevator that takes you to a hidden club.
-
Give that HP ePrint button a confident press. This will open up the world of web services and neat features, just like opening a treasure chest of printing wonders.
-
Next, choose the option that says “Enable Web Services.” It’s like granting your printer a VIP ticket to the internet.
-
Follow any on-screen instructions that appear, such as accepting terms and conditions or registering your printer. It’s like creating a social media profile for your printer, but without all the selfies and food pictures.
-
Finally, take a moment to bask in the glory of having HP Web Services enabled on your printer. Your printer is now part of the interconnected printing world, ready to receive emails and print from the cloud!
Why is my HP Photosmart 7520 not Connecting to Wi-Fi
Uh-oh, your HP Photosmart 7520 seems to have caught a case of the Wi-Fi blues. But fear not, we’ll help you get it back on the wireless bandwagon. Here are a few troubleshooting steps to try:
-
Check your Wi-Fi password: Double-check that you’re entering the correct Wi-Fi password during the printer setup. It’s like making sure you’re using the right secret handshake to enter your favorite club.
-
Move closer to the router: Just like humans, printers can sometimes struggle with long-distance relationships. Move your printer closer to the Wi-Fi router to ensure a strong and stable connection. Plus, it might appreciate the company.
-
Restart your printer and router: Sometimes, all your printer and router need is a good old restart to shake off any digital cobwebs. Power them off, count to 10 (or higher if you’re feeling adventurous), and bring them back to life. It’s like a mini technological rebirth.
-
Update your printer firmware: Head over to the official HP website, find the software and drivers section for your printer model, and check if any firmware updates are available. Installing these updates can work wonders and make your printer’s Wi-Fi connection sprint like an Olympic athlete.
-
Perform a dance routine: Okay, this one may not be scientifically proven, but hey, desperate times call for desperate measures. Create a dance routine to summon the Wi-Fi spirits and put on a show for your printer. You never know, it might just do the trick!
How do I Fix a Print Queue Issue
Ah, the infamous print queue issue, the thorn in the side of many frustrated printer owners. But fret not, brave troubleshooter! Here are a few steps to help you vanquish this digital villain:
-
Cancel the print jobs: Open the print queue on your computer and cancel any pending print jobs, just like sending those unruly job applications to the job application vortex.
-
Restart the print spooler service: Press the Windows key and search for “Services.” Open the Services app and find the “Print Spooler” service. Right-click on it, select “Restart,” and let the magic happen. It’s like giving your printer a rejuvenating dose of caffeine.
-
Clear the print spooler folder: Sometimes, the print queue can get clogged with old print spooler files, causing chaos in printer land. Open File Explorer and navigate to “C:\Windows\System32\spool\PRINTERS.” Delete all the files in this folder like a cleanliness ninja, clearing the path for smooth printing.
-
Update printer drivers: Just like a superhero needs a good costume, your printer needs up-to-date drivers to defeat print queue issues. Head over to the HP website, find the software and drivers section for your printer, and download the latest drivers. Install them with the confidence of a well-prepared superhero.
-
Perform a printer exorcism: Okay, this step might sound a bit extreme, but hey, desperate times call for desperate measures. Gather your courage, unplug your printer from the power source, and wait for a few minutes. Then, plug it back in, turn it on, and watch those print queue demons flee in terror.
How do I Set Up Fax on HP Photosmart 7520
Ah, the time has come to tackle the ultimate question – how to set up fax on your magnificent HP Photosmart 7520. Fear not, intrepid fax enthusiast, for we shall guide you through the mystical lands of fax setup. Here’s how to get your fax up and running:
-
Connect your phone line: Find the port labeled “1-LINE” or “LINE IN” on the back of your printer. Take a deep breath, summon all your cable-connecting skills, and plug one end of the phone cable into the printer and the other end into the phone wall jack.
-
Configure fax settings: On the printer’s control panel, locate the Setup button. It’s like finding the secret passage to fax greatness. Press that button, navigate to the Fax Setup menu, and dive into the settings like a brave explorer.
-
Set your fax preferences: Within the Fax Setup menu, you’ll find a plethora of options to customize your faxing experience. From choosing your fax speed to setting the number of rings before the printer answers calls, make sure to tailor these settings to your liking. It’s like making sure your fax machine reflects your unique personality.
-
Set your fax header: Ah, the fax header, the digital calling card of your fax machine. Within the same Fax Setup menu, you’ll find options to enter your fax header information, including your name, company, and phone number. Add a touch of personality to your fax header and let it stand out from the crowd.
-
Test your fax: Now, my friend, the moment of truth has arrived. Find a willing participant (a friend, colleague, or a helpful neighbor’s fax machine) and send a test fax. Choose a document, follow the steps previously mentioned in this FAQ, and introduce the fax world to your HP Photosmart 7520. A successful test fax is like tasting victory on a platter of freshly printed paper.
Congratulations! You’ve now mastered the art of fax setup. Embrace the simplicity and reliability of faxing, and let your HP Photosmart 7520 handle your faxing needs with grace and style.
Now, go forth and fax like there’s no tomorrow!