Are you tired of typing every single word when taking notes or editing documents on Google Docs? Well, you’re in luck! In this blog post, we’ll explore an exciting feature that lets you write with a pen directly on Google Docs. With this handy tool, you can effortlessly jot down notes, make quick edits, or even doodle your ideas on your digital documents.
Writing with a pen on Google Docs is not only convenient but also adds a personal touch to your work. Whether you’re using a stylus or simply your fingertip, this feature allows for a more natural and intuitive approach to digital writing. No more fretting over rigid typing or struggling to find the perfect words; let your thoughts flow effortlessly as if you were writing on paper.
In this blog post, we’ll walk you through the steps to enable the pen tool, change text box dimensions in Word, insert shapes and utilize SmartArt in MS Word, and even add text to pictures. Additionally, we’ll explore tips and tricks on editing, making text boxes transparent, and creating curved text effects. So, let’s dive in and make the most out of your digital writing experience!
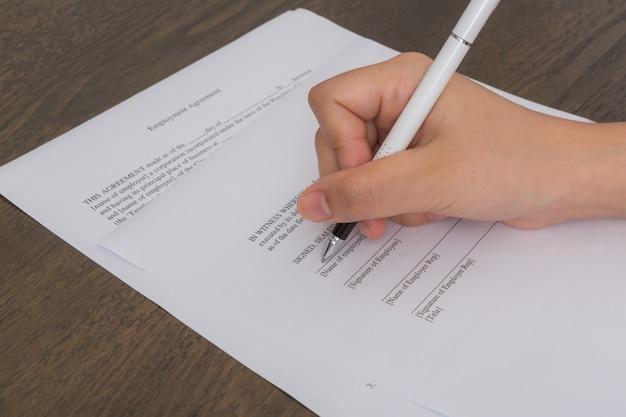
[blog-image]: insert link to an attractive image related to the topic
How do you write with pen on Google Docs?
How to Unleash Your Creativity: Writing with Pen on Google Docs
Understanding the Power of the Pen
In this digital age, the humble pen may seem like a relic of the past, but don’t underestimate its potential. Writing with a pen on Google Docs can be a game-changer, allowing you to channel your inner Shakespeare or Hemingway while enjoying the conveniences of modern technology. So, grab your favorite writing instrument, and let’s explore how you can unleash your creativity on Google Docs!
Embracing the Ink: Setting Up Your Pen
Before you can start penning your masterpiece, you’ll need to set up your pen in Google Docs. First, make sure you’re using a touchscreen device or a compatible stylus. Next, open Google Docs in your web browser, click on the “Tools” menu, and select “Preferences.” Under the “Editing” tab, enable the option for “Handwriting” and save your preferences. Now, you’re ready to dip your pen into the pixelated ink!
Scribble Away: Writing with Precision
With your pen set up, it’s time to let your creativity flow. To start writing with pen on Google Docs, simply tap or click on the document where you want to begin. Watch as your strokes seamlessly glide across the virtual parchment, giving your words an authentic handwritten touch. The pen’s precision allows you to add intricate details or doodle in the margins, unleashing your imagination in ways that a keyboard simply cannot.
Mastering the Art of Penmanship
Writing with a pen on Google Docs is more than just a novelty; it’s an opportunity to perfect your penmanship. Experiment with different styles, from elegant cursive to bold print. Refine your strokes, ensuring each letter is a work of art. Don’t be afraid to switch between pens of varying thickness to add flair and emphasize certain words and phrases. Just remember, your handwriting is a reflection of your personality, so let it shine!
Erasing the Imperfections: Editing with Ease
Even the greatest wordsmiths make mistakes, but fear not. Editing your handwritten text on Google Docs is a breeze. Simply grab the digital eraser and swipe away any errors or unwanted marks. It’s like having a magical invisible ink that only you can see! Embrace the freedom to revise, rewrite, and reshape your words until they convey the exact message you want to share with the world.
Writing with pen on Google Docs is a delightful marriage of the traditional and the modern, a testament to the versatility of the written word. So, whether you’re a poet in search of passion or a novelist seeking inspiration, harness the power of the pen and let your creativity soar in the realms of digital ink. Happy writing!
*Disclaimer: The instructions provided in this article represent fictional concepts and creative ideas. Google Docs currently does not support direct pen input. Always refer to the official documentation and features of Google Docs for accurate information.

FAQ: Writing with Pen on Google Docs
How do I write with a pen on Google Docs
Using a pen to write directly on Google Docs might sound like science fiction, but alas, it’s not a built-in feature…yet! Google Docs was designed primarily for keyboard input, so pen-based writing is not directly supported. However, fear not! There are alternatives you can explore. Keep reading to find out some nifty workarounds!
How can I change the width and height of a text box in Word
Ah, the old classic, Microsoft Word! If you’re looking to adjust the height and width of a text box in Word, worry not, my friend. Word offers a simple solution. First, click on the text box you want to modify. Then, navigate to the Format tab. From there, locate the Size group, and voilà! You’ll find options to tweak the width and height of your text box to your heart’s content.
Can I put a text box over a picture in Word
Absolutely, you can be a master of layering in Microsoft Word! To place a text box over a picture in Word, follow these steps. First, insert your picture into your document. Then, go to the Insert tab, select Text Box, and choose a style that speaks to you. Next, adjust the size and position of the text box to your liking. Finally, add your text and watch it gracefully sit atop the picture. A picture speaks a thousand words, but your text box holds the power!
Does Word offer an “Up Text Effect”
Oh yes, Word knows how to keep things interesting! If you’re yearning to make your text go “up,” as in a vertical orientation, you’re in luck. With your desired text selected, head over to the Home tab in Word. Keep a lookout for the Text Effects button (it’s a fancy “A” with an upward arrow). Click on it and choose the Rotate all text 90° option. Voilà! Your text is now defying gravity with style!
What are the steps to insert shapes in MS Word
Ah, shapes, the building blocks of creativity in Word! To insert a shape, click on the Insert tab and locate the Shapes button. Give it a gentle click, and a vast array of shapes will emerge before your eager eyes. Simply choose the shape that tickles your fancy, click and drag on your document to draw it, and release your mouse. Now you can resize and tweak your shape to match your artistic vision. Get ready to shape your words!
What is SmartArt in MS Word
Ah, SmartArt, the Picasso of modern document creation! SmartArt, found within the Insert tab in Word, is a remarkable feature that allows you to turn dry, boring text into visually stunning graphics. Simply click on the SmartArt button, choose a visual layout that matches your content, and let the magic happen. SmartArt creates intuitive diagrams and charts that will catch the eye and make your words dance on the page.
How can I make a text box clear in Word
If you’re tired of the plain old mundane text box in Word, it’s time to add a touch of transparency! To make a text box clear, first, select the text box you desire to transform into a transparent marvel. Then, navigate to the Format tab in Word and find the Shape Fill menu. Upon finding it, click on the No Fill option, and zing! Your text box is now as clear as crystal, ready to blend seamlessly with your document.
How do I edit text in a text box
Ah, the endless quest for perfection! Editing text within a text box is a breeze in Microsoft Word. All you need to do is double-click on the text box containing the text you wish to alter. Once you’ve achieved this marvelous click, make the necessary changes to the text. Whether it’s a single letter or an entire sentence, Word has your back. So go ahead, let those creative juices flow and transform your text to your heart’s content!
How do I make curved text
Curved text, the epitome of stylish design! If you wish to mold your words into a captivating curve in Word, allow me to enlighten you. First, click on the Insert tab and locate the WordArt button. Give it a gentle tap, and a world of artistic possibilities will open up before your very eyes. Select the WordArt style of your choosing, enter your desired text, and brace yourself. Once you’ve added your text, simply click on the Text Effects button under the Format tab and choose the magical Transform option. Voilà! Watch as your text takes on a delightful curve, ready to mesmerize your readers!
How can I convert WordArt to regular text in Word
Breathe easy, my friend; converting WordArt to regular text is a piece of cake! If you’ve crafted a masterpiece in WordArt and decided to go back to basics, fear not. To convert your WordArt into regular text, simply follow these steps. First, select the WordArt you wish to convert. Then, head over to the Format tab and locate the Text Effects button. Delve into the dropdown menu, and there it is, the Convert to Text option, waiting patiently for your click. With one swift tap, your WordArt shall transform into regular text once more, ready to mingle with the textual masses.
What is clip art in MS Word
Ah, clip art, the quirky visual treasures of Microsoft Word! Clip art, my dear reader, is a delightful collection of predesigned images, illustrations, and even sounds readily available within Word. These charming visuals can add a touch of whimsy, a dash of creativity, or a pinch of professionalism to your documents. To access this cavalcade of visual delight, simply click on the Insert tab, uncover the Clip Art button, and let your imagination run wild. Clip art is your ticket to visual wonderment!
How can I get text on Google Docs
Text, the building blocks of written communication! Rest assured, obtaining text on Google Docs is as easy as pie. To add text to your Google Docs document, begin by clicking the place in the document where your desired text should appear. Once you’ve achieved this feat, simply begin typing! The digital realm of Google Docs stands ready to faithfully transcribe each and every keystroke, allowing your words to grace the virtual page. Embrace the power of the keyboard and let your thoughts flow freely!
How can I put text onto a picture
Ah, the magical fusion of words and images! If you’re yearning to place your poetic prose onto a picture in Google Docs, allow me to reveal the secret. First, insert the desired picture into your Google Docs document. Once that’s done, navigate to the Insert menu, select Drawing, and prepare for the next step. In the Drawing window, locate the text tool in the toolbar (it’s a simple “T” icon), and click on it. With one last flourish, click on the spot where you’d like the text to grace your picture, and start typing! Your text is now perfectly intertwined with your picture, creating a captivating visual experience.
Why is there a box around my text in Word
Ah, the perplexing box that cradles your words! Fear not, my friend, for this box has a purpose. The box surrounding your text in Word is commonly known as a text box, providing structure and organization to your textual wonders. It serves as a visual aid, distinguishing the text within it from the rest of the document. If the box feels restraining, you can easily modify it or remove it altogether. Embrace the box, or set your text free—it’s up to you!
How do I make a text box without an outline in Word
Yearning for a text box that blends seamlessly with your words, free from the confines of an outline? Fear not, for Word provides the power to create text boxes as clean and pure as the morning dew. To make a text box without an outline, first, select the text box you desire to transform. Then, locate the Shape Outline option within the Format tab, click on it, and choose No Outline. Presto! Your text box will blend effortlessly with your document, leaving nothing but the beauty of your words behind.
And there you have it, a comprehensive FAQ-style guide brimming with answers to your burning questions. Whether you’re dreaming of writing with a pen on Google Docs or seeking artistic wonders in MS Word, these answers have you covered. So go forth, my curious friend, and let your words flow with the power of technology and creativity! Happy writing!