Are you a Honda Pilot owner who’s been puzzled by the mysterious wrench light appearing on your dashboard? Don’t worry, you’re not alone! Many Honda Pilot drivers have encountered this pesky wrench light and wondered what it means and how to turn it off. Well, you’ve come to the right place! In this blog post, we’ll delve into the common causes of the wrench light appearing, explain what the VTM-4 light means, and most importantly, provide you with step-by-step instructions on how to turn off the wrench light on your Honda Pilot.
But before we dive in, let’s briefly address the VTM-4 light. VTM 4 stands for Variable Torque Management 4-Wheel Drive, which is a feature found in Honda Pilot models equipped with all-wheel drive. This light indicates an issue with your Pilot’s 4-wheel drive system. Now, let’s get back to the wrench light! So, are you ready to bid farewell to that mysterious wrench light and regain peace of mind while driving your Honda Pilot? Let’s get started by understanding what causes the VTM-4 light to come on and how you can turn off the wrench light on your beloved SUV!
How to Banish the Wrench Light: A Honda Pilot Owner’s Guide
So, you have encountered the dreaded wrench light on your beloved Honda Pilot? Don’t panic! We’ve got you covered with this handy guide that will help you turn off that bothersome light and get back on the road in no time. And hey, we’ll have a little fun along the way too!
Unveiling the Mystery behind the Wrench Light
First things first, let’s demystify the wrench light. No, it’s not a secret symbol indicating that your car has transformed into a magical toolshed. The wrench light is actually a gentle reminder from your car’s internal computer system that something needs attention. Consider it your very own automotive personal trainer saying, “Hey, it’s time for a check-up!”
Step 1: Decode the OBD-II Error Code
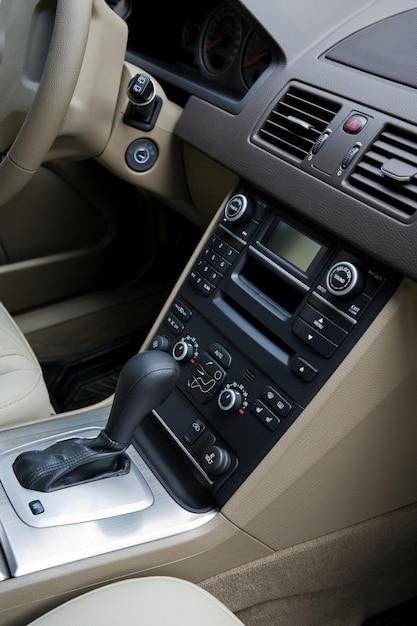
To turn off the wrench light, we first need to uncover the root cause of its appearance. This requires a little rendezvous with your car’s OBD-II port. Fear not, though—I promise this won’t involve any candlelit dinners. Simply locate the OBD-II port, usually found under the steering column, and connect an OBD-II scanner to it.
Step 2: Interpret the Scanner’s Findings
Once you’re done with the OBD-II scanner rendezvous, it’s time to interpret the scanner’s findings. This is where all the detective work begins. Look out for error codes, which are like breadcrumbs that can lead you to the root of the issue. Take note of the codes and keep them handy for the next steps.
Step 3: Consult the Elders aka Your Car’s Manual
Seeking wisdom from the elders is always a good idea, and in this case, the elders are your car’s manual. It’s time to dust it off and flip through its pages for information about the specific error codes you gathered earlier. The manual should give you insights into the meaning of the codes and possible remedies.
Step 4: Tackle the Issue Head-On
Now that you’re armed with knowledge from your car’s manual, you’re ready to tackle the wrench light issue head-on. Depending on the error codes, you might find yourself dealing with simple fixes, such as loose gas caps or faulty sensors, or more complex problems that require professional assistance. Remember, not every problem can be solved with a well-timed karate chop (though that would be cool).
Step 5: Go on a Test Drive To Confirm Success!
After performing the necessary repairs or maintenance, it’s time to put your Honda Pilot back to the test. Take your reinvigorated car on a spin, paying close attention to how it behaves. If you’ve successfully banished the wrench light, give yourself a pat on the back—you’ve just become the hero in your car’s own epic story!
Time to Say Goodbye to the Wrench Light!
Now that you know the steps to conquer the wrench light, you can bid farewell to that pesky little symbol without breaking a sweat. Remember, taking care of your car is like taking care of a good friend—it pays off in the long run and keeps them purring like a contented kitten. So go forth, conquer those error codes, and enjoy many more worry-free journeys with your Honda Pilot!

FAQ: How to Deal with Honda Pilot’s Wrench Light
Ah, the dreaded wrench light on a Honda Pilot. It’s like a little wrench is waving at you, taunting you to figure out what’s wrong with your beloved vehicle. But fear not! We’re here to answer all your burning questions about this perplexing little indicator. Buckle up and let’s dive in!
What Causes the VTM-4 Light to Come On
You’re cruising down the road, enjoying the smooth ride of your Honda Pilot, when suddenly, the VTM-4 light decides to make an uninvited appearance. What gives? Well, this light generally illuminates when there’s an issue with the Variable Torque Management-4WD system (VTM-4). It could be triggered by a malfunctioning sensor, a faulty solenoid, or even a ghost (just kidding, maybe). To get to the bottom of this, it’s best to consult your trusty mechanic or refer to the Pilot’s user manual to troubleshoot the specific problem.
How Do You Turn Off the Wrench Light on a Honda Pilot
Ah, the moment you’ve been waiting for—how to bid farewell to that pesky wrench light! In most cases, once you fix the underlying VTM-4 issue, the wrench light will vanish into thin air, as if it never bothered you in the first place. However, if it stubbornly lingers on, you can try the good old trick of disconnecting the negative terminal of your battery for a couple of minutes. Just make sure to brace yourself for a little reset action, as this process may erase some of your personalized settings such as radio presets.
How Do I Turn On 4WD in My Honda Pilot
Are you feeling a bit adventurous and ready to unleash the power of that glorious 4WD feature in your Honda Pilot? Well, you’re in for a treat. To engage 4WD mode in your Pilot, follow these simple steps:
- Locate the 4WD button placed conveniently on your dashboard.
- Make sure your vehicle is in park or neutral.
- Give that button a satisfying press.
- Voila! You’ve activated the 4WD mode and can now tackle those off-road terrains like a pro. Time to show Mother Nature who’s boss!
What Does VTM-4 Mean
VTM-4, oh how you perplex us with your cryptic abbreviation! But fear not, we’ll decode this automotive jargon for you. VTM-4 stands for Variable Torque Management-4WD, which is Honda’s fancy way of saying it has a system that helps distribute torque (or power) to all four wheels. This nifty feature provides enhanced traction in tricky situations, such as slippery roads or uneven terrains. So next time you’re driving through mud or snow, let VTM-4 be your guiding light, metaphorically speaking, of course.
Phew! We made it through the wrench light conundrum and emerged victoriously! We hope this FAQ-style guide has shed some light on your Honda Pilot’s mysteries and put your mind at ease. Just remember, when dealing with any automotive issues, it’s always best to consult your trusted mechanic or refer to your vehicle’s user manual for accurate troubleshooting steps. Now go forth, conquer those roads, and may the wrench light never haunt your driving adventures again!