So you’re experiencing issues with your Harley’s ignition system, and you suspect that the ignition module might be the culprit. Don’t worry, you’re not alone! Ignition module problems are a common source of frustration for many Harley owners. But before you rush to replace it, it’s important to test the ignition module first to confirm if it is indeed the cause of the problem.
In this blog post, we will guide you through the process of testing a Harley ignition module step by step. We’ll also explore the reasons why a CDI box, another component of the ignition system, can go bad and whether it can be bypassed. So grab your tools and join us as we delve into the world of Harley ignition modules and troubleshooting.

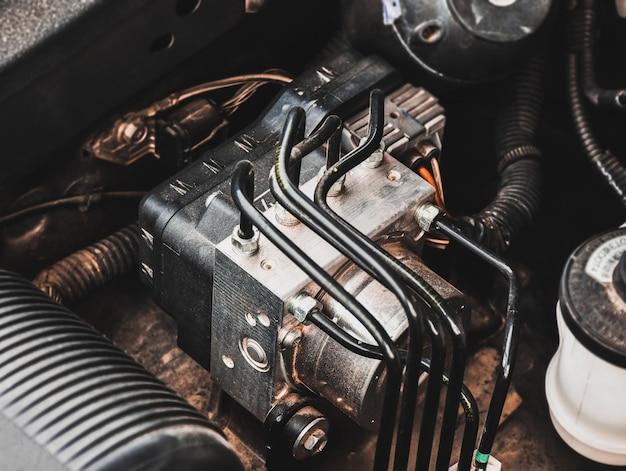
How to Put a Harley Ignition Module to the Test
When it comes to troubleshooting your treasured Harley’s electrical adventures, the ignition module is the first in line that warrants your attention. After all, without a properly functioning ignition module, your bike’s engine might as well throw in the towel and call it a day. But fear not, fellow riders! In this guide, we’ll explore the ins and outs of testing your Harley ignition module – and yes, we promise to keep it as thrilling as a midnight ride on an open highway!
Gathering the Tools of the Trade
Before we delve into the nitty-gritty of testing, it’s essential to ensure you’re properly equipped. Don your mechanic’s hat and gather the following tools:
1. Multimeter
A multimeter is like a superhero sidekick in the world of motorcycle diagnostics. Make sure you have one with a voltage setting and an ohm (Ω) setting – it’ll help you have the upper hand when testing the ignition module.
2. Safety Glasses
We’re all about style and flair, but protecting your eyes from sparks and stray electrical bits is more essential than donning a fashionable pair of shades. Safety glasses – check!
3. Soft Cloth
No, it’s not a prop for a magic trick; a soft cloth comes in handy for wiping away dirt and grime, ensuring accurate test results. Plus, it adds a touch of sophistication to your testing process!
Ignition Module Teardown: Unveiling the Secrets
Now that we’re suited up with the required gear, it’s time to embark on our electrifying journey! Follow these steps to test your Harley ignition module and unlock the secrets hidden within:
1. Find the Ignition Module
First things first, locate the ignition module. It’s usually nestled somewhere on your motorcycle, inconspicuously waiting to be discovered. Reference your bike’s service manual to pinpoint its exact location or embark on an exciting scavenger hunt – the choice is yours!
2. Disconnect the Battery
Before you begin meddling with your bike’s electrical soul, ensure the battery is disconnected. This precautionary step will help keep those shocks at bay – unless that’s your idea of a good time!
3. Inspect for Visible Damage
Give the ignition module a thorough once-over, paying close attention to any signs of visible damage like burn marks, loose connections, or the dreaded corrosion monster. If you see anything awry, it’s time to call in the reinforcements – a replacement might be in order.
4. Do the Voltage Testing Tango
To check if your ignition module is up to snuff, we’ll need to put our multimeter to good use. Set it to DC voltage mode and connect the positive (red) lead to the module’s battery voltage terminal. Simultaneously, touch the negative (black) lead to a ground on the bike – a nearby bolt or the chassis will do the trick.
5. Brave the Resistance Challenge
Resistance is futile – but not for the sake of ignition modules on Harleys! For our second test, switch the multimeter to ohm (Ω) mode and connect the leads to the ignition module’s pick-up coil terminals. A reading within the specified range mentioned in your trusty service manual indicates our ignition module is flammable – but in a good way!
You’ve Passed the Test! What’s Next
Congratulations, my fellow voltage voyagers! Your rigorous testing has hopefully unearthed any potential issues lurking within your Harley’s ignition module. If all went swimmingly, you can now reconnect the battery, rev up that engine, and bask in the glory of a job well done.
However, if your trusty ignition module didn’t emerge unscathed, fret not! Seek solace in the fact that you’ve identified the problem and now have an opportunity to replace it. Consult your service manual or discuss with your favorite mechanic for the best course of action.
Remember, dear riders, the process of testing a Harley ignition module doesn’t have to feel like a rollercoaster ride. Armed with the right knowledge, tools, your trusty multimeter, and a sprinkle of determination, you’ll be back on the road, chasing adventure, and feeling the wind in your hair – all with a perfectly functioning ignition module by your side. Happy testing and smooth riding, everyone!
FAQ: How to Test a Harley Ignition Module
So you’ve got a Harley and you suspect there might be some ignition module trouble brewing. Fear not, fellow rider! In this FAQ-style guide, we’ll walk you through the ins and outs of testing your Harley’s ignition module like a seasoned mechanic. Buckle up, rev your engines, and let’s dive into the world of spark, fire, and motorcycles!
How Do You Test a Harley Ignition Module
Testing a Harley ignition module isn’t rocket science, but it does require some know-how. Here’s a step-by-step breakdown to help you get in tune with your bike’s ignition:
1. Prepare for the Test
Before you get started, make sure you have all the necessary tools and gear in your garage. You’ll need a multimeter, a fresh cup of coffee (or your preferred beverage), and your trusty Harley repair manual. Safety first, always!
2. Locate the Ignition Module
Time to get intimate with your bike! Locate the ignition module on your Harley. It’s usually nestled somewhere near the battery or the frame. Reach out and give it a gentle pat—it’s about to reveal its secrets to you.
3. Check for Power
This step is where the magic happens. Grab your multimeter and set it to the “Volts” mode. Connect the red lead to the positive terminal and the black lead to the negative terminal of the ignition module. Now, turn on your ignition and voilà—your multimeter should display a voltage reading, ideally between 12 to 14 volts. If the reading gives you the cold shoulder, you might need to say goodbye to your ignition module.
4. Test the Trigger Wire
No, we’re not talking about setting off explosions here. Grab your multimeter once again and switch it to the “Ohms” mode. Now, disconnect the trigger wire from the ignition module and touch the multimeter leads to the terminals. A healthy ignition module should show a resistance reading within the manufacturer’s specifications. If it’s throwing tantrums, it might be time for a replacement.
5. Say Cheese… or Spark!
To truly put your ignition module to the test, you need to check if it’s generating sparks—without setting things on fire, of course. Carefully remove the spark plug wire and attach a spare spark plug to it. Ground the spark plug’s base to the engine (using a rubber-handled tool for safety) and crank the engine. If you see a spark, congratulations, you’ve got ignition! If not, it might be time to give the ignition module a swift kick out of your bike.
What Causes a CDI Box to Go Bad
Ah, the enigmatic CDI (Capacitive Discharge Ignition) box—the brain behind your Harley’s ignition system. But what can send this mysterious component into an early retirement? Here are a few possible culprits:
1. Heat, Heat, and More Heat
CDI boxes don’t take kindly to extreme temperatures. If your Harley’s been getting cozy with the sun or taking hot baths in prolonged idling sessions, the internal components of the CDI box might have fried. Let’s just say CDI boxes don’t cool down with a nice margarita on the beach.
2. Electrical Surge Sucker Punch
Sometimes, your bike’s electrical system throws a punch you never saw coming. Voltage spikes, short circuits, or faulty connections can all conspire to deliver a crippling blow to your CDI box. It’s like your bike went to a shady underground fight club—except the CDI box didn’t come out victorious.
3. Old Age Ain’t Kind
Just like us, CDI boxes don’t age like fine wine. Eventually, after years of faithful service, they start running out of steam. Wear and tear, corroded connections, and internal component breakdowns creep up like a sneaky squirrel stealing your snacks. Alas, time takes its toll on even the most hardened electronic components.
Can You Bypass a CDI Box
Ah, the notion of bypassing a CDI box might sound tempting. Can’t we just jump over this hurdle and carry on riding into the sunset? Sadly, it’s not that simple, partner. Bypassing a CDI box requires expert knowledge, precise wiring, and a deep understanding of your Harley’s ignition system. Messing with the CDI box is like playing with fire—unless you know what you’re doing, it’s best to leave it to the professionals.
Congratulations, you’ve just aced our crash course on testing a Harley ignition module! By following these steps and understanding the possible causes of CDI box failure, you’ll be well-equipped to diagnose issues and keep your ride as smooth as butter. Remember, safety always comes first, so if you’re unsure about any task, don’t hesitate to seek the guidance of a qualified Harley technician. Now go forth, brave rider, and conquer those ignition mysteries like a true road warrior!
Disclaimer: This blog post is for informational purposes only. We are not responsible for any mishaps, blown fuses, or singed eyebrows that may occur during your DIY adventures.