Welcome to our ultimate guide on how to replace an exhaust back box! If you’re a car enthusiast or simply someone looking to save money on mechanic bills, this blog post is for you. We’ll walk you through the step-by-step process of replacing your exhaust back box, answering common questions along the way.
Have you ever wondered if you could straight pipe your car on your own? Or maybe you’re curious about the difference between straight pipe and muffler delete. We’ll cover all of these topics and more. From the tools you’ll need to the estimated time it takes, we’ve got you covered. Whether you’re a beginner or have some DIY experience, replacing an exhaust back box is a manageable task.
So, let’s dive into the world of exhaust systems and discover how you can change yours without breaking the bank. Whether you’re motivated by a desire for better performance or simply need to replace a worn-out part, this guide will equip you with the knowledge and confidence to tackle the job. So grab your wrench and let’s get started!
How to Replace an Exhaust Back Box Like a Pro
Step-by-Step Guide to Replacing Your Exhaust Back Box
Replacing an exhaust back box might seem like a daunting task, but fear not! With a little bit of know-how and a touch of humor, you’ll be able to tackle this job like a pro. Follow this step-by-step guide to replace your exhaust back box and get back on the road in no time.
1. Gather Your Tools
Before you dive into the world of exhaust back box replacement, make sure you have the necessary tools on hand. You’ll need a wrench, socket set, jack stands, and, of course, a new exhaust back box. Don’t forget to grab a cold beverage to keep you hydrated during this epic DIY adventure!
2. Safety First
Prioritize your safety by wearing gloves and safety glasses. Remember, we want you to enjoy the sweet sound of a roaring engine, not the sound of someone saying “ouch!” Plus, safety gear makes you look like a total pro.
3. Lift It, Baby!
Using a jack, lift your vehicle to gain easier access to the underside. Don’t worry; we’re not dealing with rocket science here. It’s more like weightlifting for your car. Just be sure to place jack stands for added stability, because nobody wants their car coming down like a mixtape that skipped.
4. Time to Unleash the Beast
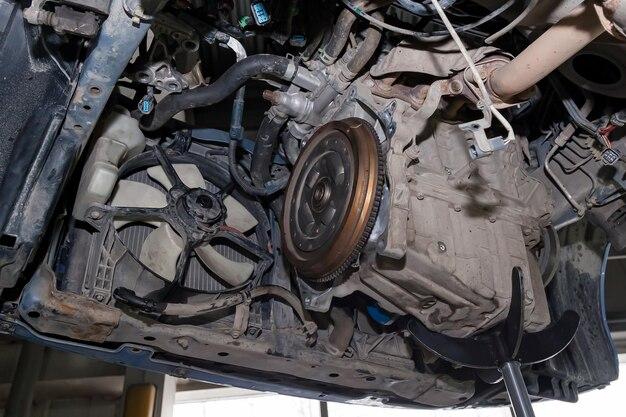
Locate the old exhaust back box under your car. It might be a bit rusty, but don’t let that intimidate you. Unscrew the bolts that hold the exhaust system together. Remember, they’ve been through a lot together, so they might be a little stubborn. Show them who’s boss!
5. Box Out, Box In
Now that you’ve unleashed the old exhaust, it’s time to install the fresh new back box. Align it properly and secure it with the bolts you just unscrewed. Don’t worry if it takes a few tries to get everything in the right position. Just like fitting into your favorite pair of jeans after a holiday season, it may require a bit of wiggling.
6. Double-Check and Lower
Give everything a final once-over, ensuring all the necessary connections are tight. Double-check your work like a detective looking for clues. If everything looks good in Inspector Gadget’s eyes, it’s time to gracefully lower your vehicle back to the ground using the jack. Trust us, graceful descents are important in the automotive world.
7. Start ‘Er Up!
Now comes the moment of truth. Start your engine and revel in the glorious note of your newly replaced exhaust back box. It’s music to your ears and a testament to your DIY prowess.
Replacing an exhaust back box doesn’t have to be an intimidating task. With this comprehensive guide, a touch of humor, and a little bit of elbow grease, you’ll be able to tackle this job like a seasoned pro. Just remember, safety first, confidence second, and don’t forget to enjoy the ride – literally!
FAQ: How to Replace an Exhaust Back Box
How to Replace an Exhaust Back Box
Replacing an exhaust back box may sound intimidating, but with the right tools and a little know-how, you can tackle this task like a pro. Here’s a step-by-step guide:
-
Safety first: Before you start, make sure your vehicle is parked on a flat surface and the engine is cool. It’s also a good idea to wear safety goggles and gloves to protect yourself.
-
Gather your tools: You’ll need a jack, jack stands, a wrench or socket set, penetrating oil, a rubber mallet, and the replacement exhaust back box.
-
Prepare your vehicle: Lift your car using the jack and secure it with jack stands. Spray some penetrating oil on the connections between the exhaust components to make the removal process easier later on.
-
Remove the old back box: Start by loosening the clamps or bolts that connect the back box to the rest of the exhaust system. Once they’re loose, carefully wiggle the back box until it comes loose.
-
Install the new back box: Position the new back box and align it with the rest of the exhaust system. Make sure it sits correctly and then tighten the clamps or bolts to secure it in place.
-
Test it out: Lower your vehicle off the jack stands and start the engine. Listen for any unusual noises or leaks. If everything sounds good, congratulations, you’ve successfully replaced your exhaust back box!
Can You Straight Pipe a Car on Your Own
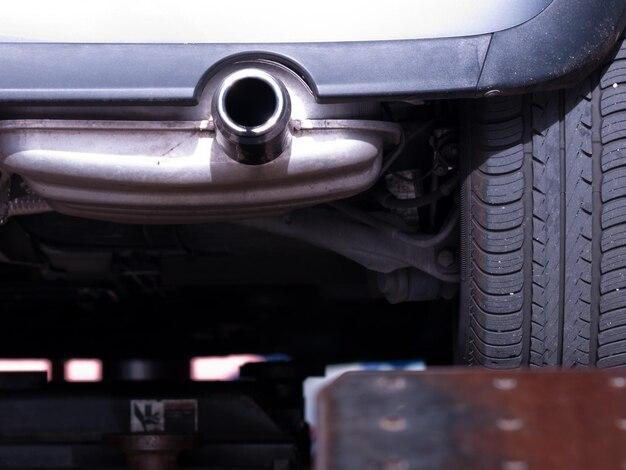
Ah, the allure of a straight-piped car – an exhaust system that’s as free-flowing as the wind in your hair on a sunny day. But can you tackle this modification yourself? Sure thing! Here’s the lowdown:
To straight pipe your car, you’ll need to remove the existing muffler and replace it with a straight pipe. This is not a task for the faint of heart, as it may require cutting and welding. If you have the necessary skills and tools, go for it! But remember, modifying your exhaust system may have legal and environmental implications, so it’s best to check local regulations before embarking on this wild ride.
How Long Does It Take to Change an Exhaust
Patience is a virtue, my friend. When it comes to changing an exhaust, the time required depends on various factors, including your experience level and the complexity of the job. On average, it can take anywhere from one to three hours.
If you’re a seasoned DIYer with all the necessary tools at your disposal, you may breeze through the process. But if you’re a beginner, take your time and allow for extra hours. Rome wasn’t built in a day, and neither should your perfect exhaust replacement.
What’s the Difference Between Straight Pipe and Muffler Delete
The world of exhaust modifications can be confusing, but fear not, I’m here to shed some light on the subject. The key differences between straight pipe and muffler delete are as follows:
-
Straight Pipe: This modification involves replacing the entire exhaust system, including the muffler, with a straight pipe. As a result, the exhaust gases flow more freely, providing a raw and aggressive sound. Buckle up, because this baby will turn heads!
-
Muffler Delete: As the name suggests, muffler delete involves removing only the muffler from the exhaust system while keeping the rest intact. This modification unleashes a deeper and more aggressive tone, but it’s slightly tamer compared to the full straight pipe.
So, whether you prefer the roaring thunder of a straight pipe or the growl of a muffler delete, choose wisely and let your exhaust sing its heart out!
How to Remove an Exhaust System
Farewell, old exhaust system! If you’re looking to remove your exhaust system for maintenance or replacement, here’s a step-by-step guide to get the job done:
-
Safety first: Put on your safety goggles and gloves to protect yourself from any debris or sharp edges.
-
Lift your vehicle: Use a jack to raise your car and secure it with jack stands. This will give you the necessary space to work underneath.
-
Loosen the clamps or bolts: Start by loosening the clamps or bolts that connect the various components of the exhaust system. Depending on your vehicle, you may need a wrench or socket set for this step.
-
Carefully remove the exhaust components: Once the clamps or bolts are loose, gently wiggle and maneuver the exhaust components until they come apart. A rubber mallet can be handy for stubborn connections.
-
Inspect and clean: Take a moment to inspect the removed components for any signs of damage or wear. Give them a good clean if needed.
Congratulations! You’ve successfully removed your exhaust system. Now you’re ready to install a new one or perform any necessary repairs.
How Much Does It Cost to Replace an Exhaust in the UK
Ah, the price tag. While it’s essential to keep your budget in mind, it’s equally important to ensure your vehicle’s health. When it comes to replacing an exhaust in the UK, the cost can vary depending on several factors, such as the make and model of your car, the type of exhaust system, and where you get the work done.
On average, a standard exhaust replacement can range from £150 to £500 in the UK. However, keep in mind that additional costs may arise if there are other damaged components or if you opt for a premium exhaust system.
It’s wise to reach out to several garages or exhaust specialists for quotes to find the best deal and ensure you’re not blowing your budget along with your exhaust system.
Now that you’re armed with knowledge, a touch of humor, and an appetite for exhaust replacement, go forth and conquer! Remember, safety comes first, and with the right tools and guidance, you’ll have your vehicle purring like a contented kitten in no time.
-“The Exhaust Enthusiast”
Please note that the information provided in this FAQ section is intended for informational purposes only and not as a substitute for professional advice. Always consult a qualified mechanic for your specific vehicle and circumstances.