Are you a car enthusiast who loves working on your own vehicle? Or maybe you’re just curious about how certain car parts are removed and replaced. Well, look no further! In this blog post, we’ll be diving into the world of rocker panels and exploring the process of removing them.
Rocker panels are an essential component of a car’s body structure, located between the front and rear wheel wells on both sides. They not only add structural integrity but also protect the vehicle’s interior from dirt, debris, and other road elements. However, there are times when you might need to remove them for various reasons, such as repairing or replacing damaged panels.
In this comprehensive guide, we will answer some common questions like “Do I need the plastic under my car?” and “What is the bottom part of the car called?” We’ll also show you how to replace rocker panels without welding, providing step-by-step instructions to make the process easier for you. So, get ready to roll up your sleeves and let’s dive into this DIY adventure!
How to Remove Rocker Panels Like a Pro
If you’re the DIY type who loves to get their hands dirty, knowing how to remove rocker panels can come in handy. These seemingly insignificant panels on the sides of your vehicle actually play a crucial role in protecting the body from road debris and corrosion. Plus, they can add a touch of style to your ride. So, if you’re ready for a little automotive adventure, grab your tools and let’s get down to business!
Tools You’ll Need
Before we dive into the nitty-gritty of removing rocker panels, it’s essential to gather the right tools. Here’s a quick rundown of what you’ll need:
1. Socket Wrench Set
You wouldn’t go to battle without your weapons, would you? Well, the same goes for tackling rocker panels. Use a socket wrench set to remove the bolts securing the panels in place. Make sure you have a variety of socket sizes, as those sneaky bolts come in different shapes and dimensions.
2. Pry Bar
A trusty pry bar is your knight in shining armor when it comes to stubborn panels that refuse to budge. Its flat chisel tip will help you loosen and pry off the panels with ease. Just be careful not to go overboard and damage the surrounding parts.
3. Rubber Mallet
Sometimes, a gentle nudge is all it takes to convince a reluctant rocker panel to let go. That’s where a rubber mallet comes in handy. Give the panel a few taps in strategic spots, and it should start to loosen up.
The Step-by-Step Guide
Now that we’ve armed ourselves with the right tools, it’s time to get to work. Here’s a step-by-step guide on how to remove those elusive rocker panels:
Step 1: Lift and Secure Your Vehicle
First things first, you need to elevate your vehicle using a jack or lift to gain better access to the panels. Make sure to consult your vehicle’s manual for the proper lifting points. And please, oh please, don’t forget to secure the vehicle with jack stands to prevent any unexpected accidents.
Step 2: Remove the Bolts
Grab your trusty socket wrench set and start removing the bolts that secure the rocker panels to the vehicle’s frame. Keep these bolts in a safe place, away from any prying pets or clumsy hands. Pro tip: use a magnetic tray to prevent them from getting lost in the abyss of your garage.
Step 3: Loosen the Panels
Remember that stubborn rocker panel we mentioned earlier? Now’s the time to show it who’s boss. Take your pry bar and gently wedge it between the panel and the vehicle’s body. Apply pressure until the panel starts to loosen. If it’s still being a picky little panel, enlist the rubber mallet for some persuasion. But please, be gentle—it’s not a karaoke session.
Step 4: Give It a Good Tug (or Three)
Once the rocker panel is loosened, it’s time for the grand finale: removing it from the vehicle. Grab hold of the panel and give it a good tug. But stay vigilant! Some panels might be connected to the vehicle through clips or retaining pins. In that case, locate these connections and detach them before proceeding with your tugging extravaganza.
Congratulations, brave DIYer! You’ve successfully learned how to remove rocker panels like a pro. Now that you’ve mastered the art of panel liberation, you can confidently tackle other automotive projects with ease. Just remember to take your time, use the right tools, and don’t be afraid to show those panels who’s boss. Happy wrenching!
Please note: The above content provides a general guide on how to remove rocker panels. It’s always recommended to consult your vehicle’s manual or seek professional assistance for specific instructions tailored to your make and model.

FAQ: How to Remove Rocker Panels
Do you want to give your vehicle a fresh look or replace damaged rocker panels? You’re in the right place! Here are some common questions and answers about removing rocker panels.
1. How Can I Remove Rocker Panels
If your rocker panels have seen better days or it’s simply time for an upgrade, removing them can be a necessary step. Here’s a step-by-step guide to help you remove rocker panels like a pro:
a) Gather the Tools and Supplies
To begin, gather the following tools and supplies:
– Socket set with various sizes
– Pry bar
– Screwdriver
– Rust converter spray (if needed)
– Rust-resistant paint (if needed)
b) Raise the Vehicle
Using a jack and jack stands, raise your vehicle to a height that allows you to comfortably work underneath.
c) Locate and Remove Bolts and Fasteners
Locate the bolts and fasteners securing the rocker panels to your vehicle’s frame. You may need to remove other parts, such as fender flares, to access them. Remember to keep track of which bolts go where to make reinstallation simpler.
d) Disconnect Electrical Wiring (if applicable)
If your vehicle has any electrical components, such as running board lights, disconnect them carefully to prevent any damage.
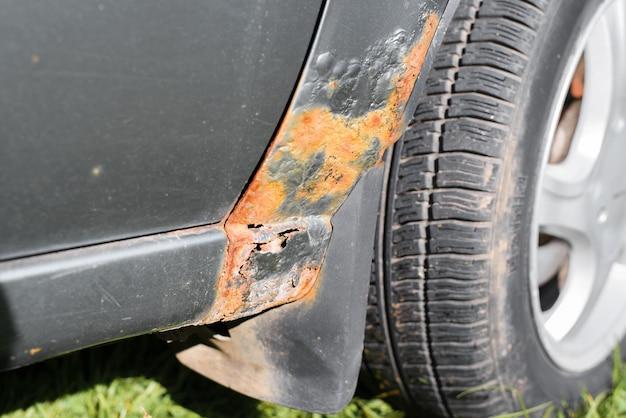
e) Apply Rust Converter (if necessary)
If you notice any signs of rust, spray a rust converter on the affected areas to halt its progress and provide optimal surface preparation.
f) Loosen and Remove the Rocker Panels
Using a socket set, pry bar, and screwdriver, carefully loosen and remove the bolts and fasteners securing the rocker panels. Once detached, gently slide them off the vehicle.
g) Clean and Prep the Vehicle Frame
With the rocker panels removed, take the opportunity to clean the frame thoroughly. This ensures a secure fit for the new panels. If there is rust, consider using a rust-resistant paint for added protection.
h) Install New Rocker Panels (optional)
If you plan to install new rocker panels, refer to the manufacturer’s instructions. Ensure proper alignment before securing them in place with bolts and fasteners.
i) Reconnect Electrical Wiring and Other Components
If applicable, reattach any electrical wiring or other components you disconnected during the removal process.
That’s it! You have successfully removed your rocker panels and can now proceed with any desired upgrades or replacements.
2. Is the Plastic Under My Car Necessary
That plastic piece you’re wondering about is typically called the “splash guard” or “undercarriage cover.” While it may seem insignificant, this plastic shield serves an important purpose in shielding vital vehicle components from dirt, debris, and water while driving.
The plastic under your car helps protect sensitive parts like the engine and transmission from potential damage caused by road debris and water splashes. Additionally, it aids in reducing wind resistance, improving aerodynamics, and enhancing fuel efficiency.
So, even though it may not be the star of the show, that small plastic piece is indeed essential for the overall well-being and performance of your vehicle. Keep it intact for a smoother and safer ride!
3. How Can I Replace Rocker Panels Without Welding
Welding may seem like a daunting task, but fear not! You can replace rocker panels without welding by following these alternative methods:
a) Panel Bonding Adhesive
Panel bonding adhesive is a popular choice for rocker panel replacement without welding. This strong adhesive creates a durable bond between the new panel and the vehicle’s frame. It’s important to ensure a clean and properly prepared surface before applying the adhesive for optimal adhesion.
b) Pop Rivets or Bolts
Using pop rivets or bolts is another viable option for replacing rocker panels without welding. These fasteners securely connect the new panel to the vehicle’s frame. Just make sure to choose the appropriate size and type of rivets or bolts for your specific vehicle model.
c) Professional Installation
If you’re unsure about replacing rocker panels yourself or prefer to leave it to the experts, visiting a professional body shop is always an excellent choice. Trained technicians can replace your rocker panels using the most suitable method for your vehicle, ensuring a seamless and reliable result.
With these welding alternatives, you can confidently replace your rocker panels and revitalize your vehicle’s appearance without worrying about breaking out the welding torch!
4. What is the Bottom Part of a Car Called
The bottom part of a car has a few different names depending on who you ask. Technically, it’s known as the “undercarriage” or the “chassis.” These terms encompass the entire framework that supports the vehicle and holds everything together, including the engine, suspension, exhaust system, and more.
But, in a less formal and more playful context, some folks affectionately refer to the undercarriage as the “belly” or the “tummy” of the car. Perhaps because it’s where all the inner workings and vital organs are nestled, much like our own bellies after enjoying a hearty meal!
So, whether you prefer the technical jargon or enjoy injecting a touch of humor into your automotive vocabulary, the bottom part of your car is a crucial component that deserves recognition by any name.
Now armed with the knowledge on how to remove rocker panels, the importance of the plastic under your car, alternatives to welding, and the various names for the bottom part of your vehicle, you’re well-prepared to embark on your automotive adventures!
Remember, if you ever feel unsure or overwhelmed, there’s no shame in seeking professional help. Stay safe, have fun, and keep those rocker panels rockin’!