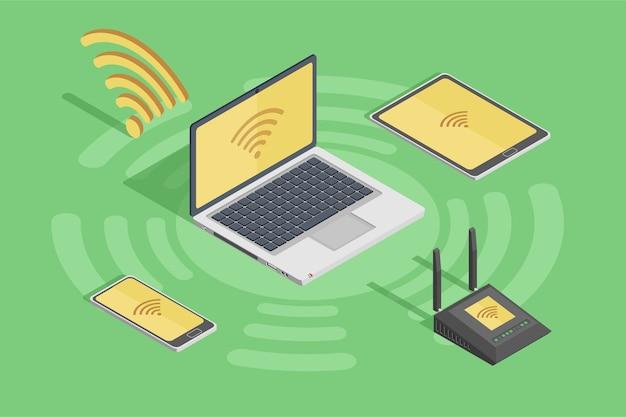
Is your WiFi network running slow or experiencing connectivity issues? One common cause could be the presence of too many devices connected to your network. Whether it’s unwanted guests using your WiFi or devices that you no longer need to keep connected, it’s important to know how to manage and remove devices from your WiFi.
In this blog post, we will provide step-by-step instructions on how to remove devices from your WiFi network. Additionally, we will answer frequently asked questions like “How can I see all devices connected to my WiFi?” and “How do I change my WiFi from 5g to 2.4g?”. So, if you’re ready to optimize your WiFi performance and regain control over your network, keep reading.
Keywords: How can I see all devices connected to my WiFi Virgin Media?, How do I change my WiFi from 5g to 2.4 g virgin?, Is Virgin Media 2.4 GHz or 5Ghz?, Which WiFi channel is the fastest?, How do I remove a device from Virgin Media?, How do I remove a device from my home network?, Does 5Ghz WiFi go through walls?, How do I change my WiFi frequency?, How do I change my WiFi channel Virgin Media?, How can I speed up my 2.4 GHz WiFi?, Are higher WiFi channels better?, How do I block a device from my WiFi Virgin Media?, How do I see who is connected to my virgin WiFi?, What devices should be on 2.4 GHz and 5GHz?, Can I use 2.4 GHz and 5GHz at the same time?, How do I remove devices connected to my WiFi?
How to Say Sayonara to Unwanted WiFi Connections
So, you’ve got some freeloaders mooching off your WiFi, huh? Well, it’s time to show them the exit door. In this guide, we’ll explore some snappy techniques to remove those pesky devices from your WiFi network and reclaim your bandwidth. Whether it’s your nosy neighbor or that mysterious “Device 007” you’ve never seen before, we’ve got you covered.
Check your Inner WiFi Sanctum
The first step towards purging unwanted devices from your WiFi network is to dive into your router’s settings. Think of it as your WiFi control center, where you hold the power to banish intruders like a mighty WiFi superhero. To access these settings, open your preferred web browser and enter your router’s IP address. Usually, it’s something like 192.168.1.1 – a string of numbers that secretly controls your digital fortress.
The Mysterious (Black)List
Once you’ve entered the realms of your router settings, it’s time to find the blacklist or blocklist. This mystical place is where you can banish undesirables with a mere click, ensuring they’ll never again sully your WiFi connection. Locate the Blacklist/Blocklist section and start adding the MAC addresses of the devices you want to disconnect. Not sure what a MAC address is? Don’t panic! It’s just a unique identifier for every device connected to your WiFi. Think of it as a “digital name tag.” Remember to click save, or else your dastardly foes might slip through the cracks.
Let the Password Wars Begin!
An easy solution to the freeloaders problem is to simply change your WiFi password. It’s like locking the entrance to your WiFi kingdom and tossing the key into a fiery volcano. But beware, this battle will require you to reconnect all your personal devices with the new password, so make sure to write it down – preferably on something more secure than that old sticky note on your desk. Once you’ve triumphed over the password change, the freeloaders will be left scratching their heads, unable to connect to your network.
Wave goodbye with a Factory Reset
If all else fails and the freeloaders still evade your WiFi justice, it’s time to bring out the big guns – the factory reset. This drastic measure will wipe your router clean, restoring it to its original settings. It’s like a digital baptism, minus the holy water. But beware, this nuclear option will require some post-reset setup, so be prepared to reconnect all your devices and reconfigure settings like WiFi name and password.
A Final Word of Wisdom
Now that you’re armed with the knowledge to exorcise unwanted devices from your WiFi network, remember to use your newfound powers wisely. Though it may be tempting to go on a device-removing rampage, be sure to double-check and verify that the devices you banish are, indeed, the freeloaders. You wouldn’t want any innocent devices caught in the crossfire.
So go forth, WiFi warrior, and reclaim your virtual territory. Your WiFi network will be lean, mean, and lightning-fast once again. And remember, the only devices connected to your WiFi should be the ones you’ve invited to the digital party. Happy device removing!
FAQ: How do I Remove Devices Connected to My WiFi?
How can I see all devices connected to my WiFi
To see all devices connected to your Virgin Media WiFi, follow these simple steps:
- Open a web browser on a device connected to your WiFi network.
- Type “192.168.0.1” into the address bar and press enter.
- Log in using your Virgin Media Hub’s username and password. If you’ve never changed these, the default username is “admin” and the default password is “changeme.” (Don’t worry, we’ll keep this between us!)
- Once logged in, navigate to the “Connected Devices” or “Device List” section.
- Here, you’ll find a list of all devices currently connected to your WiFi. Feel free to take a peek and see who’s been hogging all the bandwidth!
How do I change my WiFi from 5GHz to 2.4GHz on Virgin Media
If you want to switch your Virgin Media WiFi from 5GHz to 2.4GHz, don’t worry, it’s as easy as pie. Follow these steps:
- Open a web browser on a device connected to your Virgin Media network.
- Type “192.168.0.1” into the address bar and hit enter.
- Log in using your Virgin Media Hub’s username and password. If you haven’t changed them, the default username is “admin” and the default password is “changeme.” (We really need to work on making these default passwords more exciting!)
- Once you’re logged in, head over to the settings page. You might find it under the “Wireless” or “WiFi” section, but it depends on your Virgin Media hub model.
- Look for the option to change the WiFi frequency or band. Select 2.4GHz and save your changes.
- Voila! Your Virgin Media WiFi will now be running on the 2.4GHz frequency. Time to enjoy a smoother connection!
Is Virgin Media WiFi 2.4GHz or 5GHz
Virgin Media WiFi is a dual-band system, which means it operates on both 2.4GHz and 5GHz frequencies. This allows you to choose the frequency that best suits your devices and location.
The 2.4GHz band provides a wider coverage area and better penetration through walls, making it ideal for devices placed farther away from your Virgin Media hub.
On the other hand, the 5GHz band offers faster speeds and is less prone to interference, making it perfect for devices that require high-performance connections, such as gaming consoles or streaming devices.
So, whether you’re a wall-hugger or a speed demon, Virgin Media has got you covered!
Which WiFi channel is the fastest
When it comes to WiFi channels, it’s like a battle royale for the fastest connection! But fret not, we’re here to guide you to the champion:
- Log in to your Virgin Media Hub using a web browser on a device connected to your WiFi network.
- Navigate to the wireless or WiFi settings page.
- Look for the option to change the WiFi channel. It might be under “Advanced Settings” or “Wireless Settings,” depending on your hub model.
- Generally, the channels in the 5GHz frequency range offer faster speeds due to less interference. So, if your devices support 5GHz, go ahead and choose a channel in that range.
- If you’re using the 2.4GHz band, channels 1, 6, or 11 are usually the best options as they don’t overlap and cause interference.
Remember, the WiFi channel landscape can get quite crowded, so choose wisely to ensure a smooth and speedy connection!
How do I remove a device from Virgin Media
If you want to give a naughty device the boot from your Virgin Media WiFi, here’s what you need to do:
- Fire up a web browser on a device connected to your Virgin Media network.
- Type “192.168.0.1” into the address bar and press enter.
- Log in using your Virgin Media Hub’s username and password. You know the drill by now: default username is “admin,” default password is “changeme.”
- Once inside the hub settings, find the section for connected devices or device management.
- Locate the device you want to give the farewell treatment and click on the corresponding option to remove or block it from the network.
- Confirm your decision, and that device will no longer have access to your WiFi. Sayonara, unwanted guest!
How do I remove a device from my home network
To bid adieu to a bothersome device from your home network, follow these simple steps:
- Open a web browser on a device connected to your home network.
- Enter your router’s IP address into the address bar. If you don’t know it, check the router’s manual or look for a sticker on the device itself.
- Enter the username and password to log in to your router’s settings. If you haven’t changed them, the default username and password should be mentioned in the manual or the sticker we mentioned earlier.
- Once you’re logged in, navigate to the section that manages connected devices. This might be called “Connected Devices,” “Device List,” or something similar, depending on your router.
- Locate the device you want to remove and select the option to disconnect or remove it from the network.
- Confirm your choice, and that device will no longer be a part of your home network. Goodbye, unwanted intruder!
Does 5GHz WiFi go through walls
Ah, the age-old question: does 5GHz WiFi have the superpower to penetrate walls? Well, it’s time to put on our Sherlock Holmes hat and solve the mystery:
The 5GHz WiFi frequency has a shorter wavelength than 2.4GHz, which means it has a harder time passing through walls and other solid objects. So, the answer is a resounding “no.”
However, don’t despair! While 5GHz may struggle with walls, it more than makes up for it in speed and performance when you’re within range.
So, if you’re sitting right next to your Virgin Media hub or have an open floor plan, bask in the glory of 5GHz speeds. But if you’re a bit farther away or have walls in the way, 2.4GHz will be your WiFi knight in shining armor.
How do I change my WiFi frequency
If you’re itching to change the WiFi frequency on your Virgin Media hub, we’ve got your back! Follow these steps to make the switch:
- Open a web browser on a device connected to your Virgin Media network.
- Enter “192.168.0.1” into the address bar and press enter.
- Log in using your Virgin Media Hub’s username and password. If you haven’t changed them, the default username is “admin” and the default password is “changeme.”
- Once logged in, navigate to the wireless or WiFi settings page.
- Look for the option to change the WiFi frequency or band. Depending on your hub model, you may see 2.4GHz, 5GHz, or dual-band options.
- Select the desired frequency and save your changes.
- Congratulations! You’ve successfully altered the frequency of your Virgin Media WiFi. Now enjoy the new WiFi vibes!
How do I change my WiFi channel on Virgin Media
If you’re looking to switch up your WiFi channel on Virgin Media for better performance, get ready to channel your inner tech guru with these steps:
- Open a web browser on a device connected to your Virgin Media network.
- Enter “192.168.0.1” into the address bar and hit enter.
- Log in using your Virgin Media Hub’s username and password. In case you need a reminder: default username is “admin,” default password is “changeme.”
- Once you’re in, locate the wireless or WiFi settings page.
- Look for the option to change the WiFi channel. It might be under “Advanced Settings” or “Wireless Settings,” depending on your Virgin Media hub model.
- Scan the available channels and select a different one that offers the best performance. Channels 1, 6, and 11 on the 2.4GHz band are usually a safe bet.
- Save your changes, and your Virgin Media WiFi will now be rocking a new channel. Happy surfing!
How can I speed up my 2.4GHz WiFi
If your 2.4GHz WiFi is feeling sluggish, don’t give up hope just yet. Try these tips to give it a little boost:
- Find a central location for your Virgin Media hub. Placing it away from walls or obstructions can improve the signal strength and overall speed.
- Minimize interference from other devices. Keep your hub away from thick walls, cordless phones, baby monitors, microwave ovens, and other potential WiFi signal disruptors.
- Reduce the distance between your hub and your devices. The closer they are, the stronger the signal and the faster your WiFi will be.
- Upgrade your hub or consider getting a WiFi extender or repeater to amplify the signal and extend the coverage area.
- Make sure your hub’s firmware is up to date. Manufacturers often release updates that can improve performance and fix known issues.
- Finally, double-check that you’re using the optimal WiFi channel for your location. Experiment with different channels to find the one that works best.
With these simple tweaks, your 2.4GHz WiFi will be feeling sprightly in no time!
Are higher WiFi channels better
When it comes to WiFi channels, higher isn’t always better. Let’s break it down:
In the 2.4GHz band, channels 1, 6, and 11 are considered the best options. These channels don’t overlap with each other, reducing interference and improving performance. So, in this case, it’s not about being higher; it’s about being smarter!
In the 5GHz band, the available channels vary depending on your location. However, higher-numbered channels tend to have less congestion and interference, leading to better speeds and a more reliable connection. So, in this case, higher can indeed be better!
The key is to select the channel that offers the least interference and congestion for your specific environment. Don’t worry; you don’t need a crystal ball for this! Just follow our previous tips on how to change your WiFi channel, and you’ll be channeling the WiFi gods in no time!
How do I block a device from my Virgin Media WiFi
If there’s a device on your Virgin Media network that deserves the banhammer, follow these steps to block it like a boss:
- Open a web browser on a device connected to your Virgin Media network.
- Type “192.168.0.1” into the address bar and hit enter.
- Log in using your Virgin Media Hub’s username and password. Need a refresher? Default username: “admin,” default password: “changeme.”
- Inside the hub settings, find the section for connected devices or device management.
- Locate the device you want to block and click on the corresponding option to block, ban, or remove it from the network.
- Confirm your decision, and that device will be escorted out of your WiFi kingdom. Buh-bye, unwanted interloper!
How do I see who is connected to my Virgin WiFi
Curious to know who’s hitched a ride on your Virgin WiFi? Let’s unravel this mystery together:
- Grab a device connected to your Virgin WiFi network.
- Open a web browser and type “192.168.0.1” into the address bar. Tap enter, my friend.
- Now, it’s time to bring out your secret login credentials. Enter your Virgin Media Hub’s username and password. In case you forgot: username: “admin,” password: “changeme.” Keep those passwords safe, okay?
- Once you’ve gained access to the hub settings, look for the “Connected Devices” or “Device List” section. It’s usually just a click away!
- Behold! You’ll find a glorious list of all the devices currently connected to your Virgin WiFi.
Now you can satisfy your detective cravings and keep an eye on your WiFi companions!
What devices should be on 2.4GHz and 5GHz
Ah, the great WiFi divide! Let’s discuss which devices are better off on 2.4GHz and which ones shine on 5GHz:
2.4GHz is perfect for devices that need a wider coverage area or face obstacles like walls, floors, or ceilings. Devices like smart thermostats, security cameras, printers, and older devices that don’t support 5GHz can happily reside in this frequency.
On the other hand, 5GHz is the go-to choice for devices that require faster speeds and optimal performance. This includes laptops, smartphones, tablets, gaming consoles, streaming devices, and modern smart home devices.
Remember, not all devices are created equal, so make sure to check their specifications to see if they support 5GHz. It’s all about finding the perfect frequency balance for your WiFi party!
Can I use 2.4GHz and 5GHz at the same time
Absolutely! Virgin Media WiFi is a dual-band system, allowing you to use both 2.4GHz and 5GHz frequencies simultaneously. It’s like having two separate lanes on the WiFi highway!
This means you can connect devices that are compatible with either frequency and enjoy the benefits of each. So, go ahead and use the 2.4GHz band for devices that need better coverage or have older technology, while reserving the mighty 5GHz band for devices that require blazing-fast speeds and low latency.
With Virgin Media, you get the best of both worlds without having to choose sides. It’s like having your WiFi cake and eating it too!
How do I remove devices connected to my WiFi
Time to bid farewell to some unwelcome WiFi guests? Let’s kick them out with style:
- Access your Virgin Media hub settings by opening a web browser on a device connected to your WiFi network.
- In the address bar, type “192.168.0.1” and hit enter.
- Enter the username and password for your Virgin Media hub. In case you’ve forgotten: username is “