Are you experiencing issues with your HID lighting system? Perhaps your lights are flickering or not turning on at all. Chances are, the problem lies with the ballast. The ballast is an essential component that provides the necessary power to ignite and regulate the flow of electricity in high-intensity discharge (HID) bulbs.
In this comprehensive guide, we will explore the signs of a bad ballast, the potential risks of a faulty ballast, and most importantly, how to remove a HID ballast. Whether you’re a DIY enthusiast or simply looking to understand the process, we’ve got you covered. No need to panic! By the end of this post, you’ll have the knowledge and confidence to tackle the task yourself, all in the comfort of your own home.
So, let’s dive in and learn how to remove a HID ballast without the need for an electrician. You’ll be illuminating your space again in no time!

How to Bid Farewell to that Pesky HID Ballast
They say change is the only constant in life. Well, that may hold true for most things, except maybe for that HID ballast clinging onto your lighting fixtures. If you’ve ever tried to get rid of this little devil, you know what I’m talking about. Fear not, my fellow ballast-battlers, for I have come to your rescue with this foolproof guide on how to bid farewell to that pesky HID ballast once and for all.
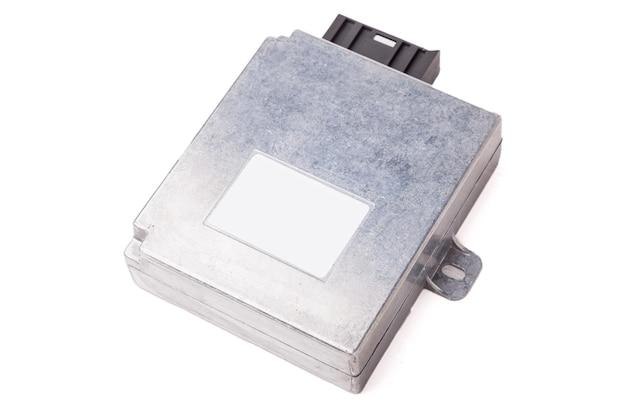
Unveiling the Mysterious HID Ballast
Before we dive into the removal process, let’s briefly demystify the enigma known as the HID ballast. Think of it as the brain of your HID lighting system, responsible for regulating the electrical current and ensuring those bulbs of brightness shine bright like a diamond. Over time, though, these ballasts can become cranky, causing flickering lights or even complete blackout.
Step 1: Preparations – Safety First, Duh!
Now, before we embark on our journey to liberation, we must take a moment to ensure our own safety. Grab a pair of gloves to protect those delicate hands of yours. After all, we don’t want to end up with any unexpected shocks or nasty burns. Safety goggles are also a good call because, well, no one wants to risk an eye casualty while battling the stubborn HID ballast.
Step 2: Power Down – Bye Bye, Electricity!
This step may seem like a no-brainer, but it’s astonishing how many people skip it and end up dancing an electric jig they never signed up for. So, my friends, power down! Locate your electrical panel and flip that magical switch that shuts off the power to the area where your HID ballast resides. Safety is no joke, my friends.
Step 3: Prepare for Surgery – Tools at the Ready
Now that we’ve established a safe environment, it’s time to prepare for ballast extraction surgery. Channel your inner handyman and gather the tools you’ll need for this operation. A flathead screwdriver usually does the trick for most ballast removals, but some cases may require a Phillips screwdriver or even a pry bar. Remember, every HID ballast removal is unique, like a snowflake… or a thumbprint.
Step 4: Unleash Your Inner Detective – Locate the Culprit
With our tools at the ready, it’s time to uncover the hiding spot of our mischievous ballast. Grab a flashlight – Sherlock Holmes style – and investigate the spaces around your lighting fixture. You may find the ballast lurking within the fixture itself, attached to the ceiling, or even hanging out in a nearby electrical box. Fearlessly track down the culprit, my brave ballast hunters.
Step 5: Set the Ballast Free – Buh-Bye, Little Buddy!
Ah, the moment we’ve all been waiting for – liberation! Once you’ve located the ballast, it’s time to set it free from its prison. Carefully remove any screws or fasteners holding the ballast in place. With a gentle tug, detach any wires connected to it. Keep your eyes peeled for any sneaky wire nuts that may be lurking around, as they tend to be quite the escape artists. Dispose of your conquered foe responsibly, bid it farewell, and watch it disappear into the abyss of ballast oblivion.
Step 6: Replacement Shenanigans – Light It Up, Buttercup!
But wait, our journey doesn’t end here! If you wish to reclaim the luminous glory of your lighting system, you must pave the way for a new ballast or perhaps even embrace the wonders of LED technology. This is a topic for another day, my friends, but fear not – there are plenty of resources out there to guide you on your quest to relight your space.
The Ballast Vanquisher
Congratulations, my brave soul! You have emerged victorious from the battle against the dreaded HID ballast. No more flickering lights or electrical hiccups shall plague your sanctuary. So revel in your triumph, and know that you possess the knowledge and courage to face any ballast that dares to cross your path. Onward, lighting warriors, to a future filled with radiant brilliance!
Disclaimer:
The information provided in this guide is for educational and entertainment purposes only. Always consult a qualified electrician or professional before attempting any electrical work. The author and publisher disclaim any liability from any damages or injuries arising from the use of this information. Stay safe, folks!
FAQ: How to Remove an HID Ballast
In this FAQ-style section, we will address some common questions related to removing a High-Intensity Discharge (HID) ballast for your lighting needs. Whether you’re a DIY enthusiast or a novice seeking guidance, we’ve got you covered with expert answers that will illuminate the process. So, let’s set the stage and brighten up your knowledge!
What are the Indications of a Faulty Ballast
When it comes to ballast troubles, your lighting system won’t shy away from letting you know something’s amiss. Look out for these signs of a rebellious ballast craving attention:
-
Flickering Lights: Are your lights giving you a disco party ambiance without an invitation? A flickering HID light could be a cry for help from a waning ballast.
-
Dimmed Lights: If your once vibrant lights are now dim and lackluster, it could be a sign of a faulty ballast struggling to keep up with the illuminating duties.
-
Buzzing or Humming Noises: Is your lighting setup channeling its inner bee? Strange buzzing or humming sounds might indicate a ballast in need of some tender loving care.
Do I Require an Electrician to Replace a Ballast
Electricians are like the superheroes of the electrical world, but don’t fret just yet! You might not always need to summon their powers for a ballast replacement. Here’s the lowdown:
-
DIY Accessibility: Removing an HID ballast can be a DIY-friendly endeavor, especially if you’re comfortable handling electrical work and have basic technical skills. Just remember to safely disconnect the power supply before diving in!
-
Complexity Concerns: If the mere thought of handling wires and components leaves you feeling a little “shocked,” it’s best to summon an experienced electrician. They’ll come equipped with the necessary expertise and keep electrical calamities at bay.
What Happens When a Light Ballast Goes Bad
Ah, the vicissitudes of life! Like the stars that fade away, so do HID ballasts that have reached the end of their illuminating journey. Here’s what you can expect when your ballast decides to hang up its lighting boots:
-
Light Extinction: Bid adieu to the beautiful illumination that once graced your abode or workspace. A faulty ballast can cause lights to go completely dark, leaving you yearning for their radiant glow.
-
Incompatibility Issues: As ballasts age, they might start interfering with the perfect harmony between the bulbs and the electrical circuitry. This can lead to bulb burnouts, lighting imbalances, and an overall unsightly environment.
How to Perform the Houdini Act: Removing a HID Ballast
It’s time to roll up our sleeves and delve into the process of gracefully bidding farewell to an old HID ballast. Here’s a step-by-step guide to help you master this magical act:
-
Safety Check: Prioritize safety above all else! Switch off the power supply and ensure no electrical currents are coursing through the system. Safety goggles and insulated gloves? We’ll leave the fashion choices to you!
-
Unhinging the Old: Unscrew the ballast’s cover, which may be attached by a few screws or held in place by clips. Take a quick screenshot of the wiring configuration for later reassembly reference. You don’t want to puzzle over it like a daunting riddle!
-
Wire Detox: Tenderly disconnect the wires from the ballast, making sure to distinguish between individual wires. Remember, a tangled mess of wires won’t bode well for anyone involved.
-
Saying Goodbye: With the wires unarmed and the ballast free, bid farewell to the old ballast like a gracious host dismissing an exhausted guest. Dispose of it responsibly, following local regulations and recycling guidelines.
Will a Misbehaving Ballast Cause My Bulbs to Burn Out
No one wants a ballast that playfully torments their bulbs, causing early burnouts and an unnecessarily high replacement budget. Here’s what you need to know:
-
Bulb Battlefield: A faulty ballast can wage war on your bulbs, resulting in their untimely demise. Irregular power supply and voltage fluctuations can push bulbs to their limits, causing premature burnouts and growing frustration.
-
Duo’s Dilemma: Replacing just the bulbs without addressing the underlying ballast issue is like dressing the symptoms instead of curing the ailment. Ensure you find the perfect harmony between the bulbs and the newly installed ballast for uninterrupted lighting bliss.
Can a Ballast be Mended, or Are We at the “Endgame”
There’s hope! Some ballasts might be as tenacious as a cat clinging to your favorite couch. While repairing them isn’t always feasible, it’s still worth considering these points:
-
Manufacturer’s Magic: Contact the ballast’s manufacturer and check if they offer repair services or replacement parts. You might be able to resurrect your ballast from the shadows, saving both money and resources.
-
Electrical Necromancers: Seek out professional electricians with a flair for breathing life back into defunct ballasts. They possess hidden knowledge, a magical touch, and a stash of spare parts that could revive your ballast from a seemingly inevitable demise.
With these FAQs, you’re now armed with the knowledge to tame even the wildest HID ballast conundrums. Whether you opt for a fearless DIY journey or entrust it to the experts, may your path be illuminated and your lighting dreams never shrouded in darkness!
Now go forth, my luminous friend, and conquer the world of ballast removal like a true lighting legend!