Are you struggling with a faulty or worn-out belt tensioner assembly and wondering how to remove it? You’ve come to the right place! In this comprehensive guide, we will walk you through the process of removing a belt tensioner assembly, step-by-step. Whether you’re a seasoned DIY mechanic or a beginner, this guide will provide you with the knowledge and confidence to tackle this task.
But before we dive into the nitty-gritty of removing a belt tensioner assembly, let’s answer a few commonly asked questions. What happens if the timing belt is off by one tooth? How much does it cost to fix a timing belt tensioner? Can you tell if a timing belt needs to be replaced? Do you need to replace the water pump with the timing belt? We’ll address these burning questions and more along the way, ensuring you have all the information you need to successfully complete this repair job.
So, gear up and get ready to learn how to remove a belt tensioner assembly in this comprehensive guide. Say goodbye to that annoying squeaking or slipping belt and hello to a smooth and efficient ride. Let’s get started!
How to Say Goodbye to a Belt Tensioner Assembly
Replacing a belt tensioner assembly may sound intimidating, but fear not! With a bit of courage and the right know-how, you can tackle this task like a seasoned mechanic. In this guide, we’ll walk you through the ins and outs of removing a belt tensioner assembly, making your car repair journey a breeze. So fasten your seatbelt (but only after we’ve removed the tensioner assembly, of course), and let’s get started!
Preparing for the Great Tensioner Takedown
Before we dive into the nitty-gritty of actually removing the belt tensioner assembly, let’s cover a few basics to ensure you’re ready for action.
Gather your Tools (and Your Wits)
Just like a knight heading into battle, you’ll need to arm yourself with the right tools. Grab a socket set, a ratchet, and most importantly, a sense of humor. Remember, laughter is the best tool in any DIY endeavor. As for your wits, you’ll need those to navigate the twists and turns of the belt tensioner assembly removal process. So take a deep breath, channel your inner gearhead, and let’s get cracking!
Safety First, Folks!
Before we embark on our belt tensioner adventure, it’s essential to prioritize safety. Ensure your vehicle is parked on a stable surface and engage the parking brake (you don’t want your car going on a solo joyride!). If you’ve recently been driving, let your engine cool down, as we wouldn’t want any unexpected burns to dampen our spirits. And of course, keep those safety goggles handy, because who doesn’t love a fashionable accessory that protects your eyes?
The Art of Unleashing the Belt Tensioner Assembly
Now that we’ve prepared ourselves for this epic battle, it’s time to execute the master plan and bid farewell to that pesky belt tensioner assembly.
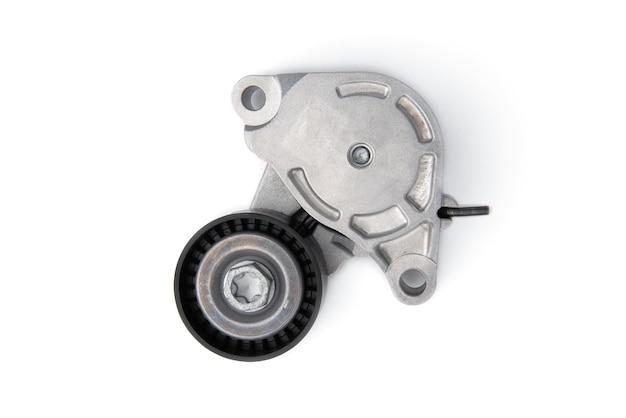
Locate the Tensioner (It’s Like Hide and Seek, but Less Fun)
Start by locating the belt tensioner assembly in your vehicle’s engine compartment. It’s like playing hide and seek, but without the thrill of finding your favorite childhood toy. Look for a pulley that the serpentine belt wraps around, typically situated near the front of the engine. And remember, patience is key here; if you’re having trouble finding it, resist the urge to throw a tantrum. We’re all in this together!
Apply Some Socket Magic
Now that the tensioner is within sight, it’s time to bring out your trusty socket set. Identify the appropriate socket size that fits snugly onto the tensioner pulley bolt. Once you’ve found your match, slide it onto the ratchet and prepare for some serious socket wizardry.
Summon Your Inner Hercules
With socket in hand, rotate the ratchet counterclockwise to apply force to the tensioner. Picture yourself as Hercules, exerting your might on the belt tensioner assembly (sans the bulging muscles and lion headgear). As you turn the ratchet, you’ll notice the tension in the belt easing, almost as if the tensioner is waving goodbye. Keep turning until the belt is loose enough to slip off easily. Victory is within reach!
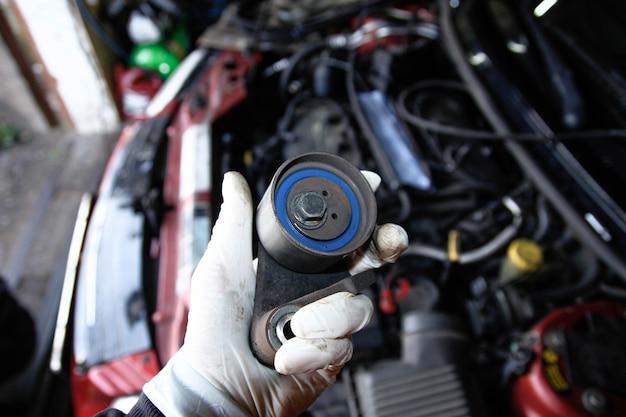
Bid Farewell to the Tensioner
With the serpentine belt suitably relaxed, it’s time to remove the belt tensioner assembly itself. Locate any mounting bolts holding the tensioner in place and bid them farewell with your socket set. Once you’ve loosened and removed the bolts, gently pry the tensioner away from its cozy spot in the engine. As you do so, don’t forget to sing a farewell ballad to your reliable old friend, because let’s face it, they’ve been under a lot of tension lately.
Wrapping Up (But Not the Belt!)
Congratulations, brave soul! You’ve triumphantly removed the belt tensioner assembly, leaving behind a legacy of laughter, perseverance, and a newfound expertise in car repairs. So take a moment to bask in your glory before embarking on the next adventure. In our next installment, we’ll cover the installation of a shiny new belt tensioner assembly, completing your journey towards vehicular bliss. Until then, keep your wrenches polished and your spirits high as you continue to explore the fascinating world under your car hood. Safe travels!
DIY Belt Tensioner Assembly Removal: Your Burning Questions Answered!
If you’ve noticed an annoying squealing sound coming from under the hood or your vehicle’s belts are not functioning properly, it might be time to replace the belt tensioner assembly. But removing this vital component can be a bit tricky, especially if you’re not a seasoned mechanic. Don’t worry, though! We’ve put together this helpful FAQ-style guide to walk you through the process. So, grab your tools and let’s dive in!
Question 1: How do you remove a belt tensioner assembly
Removing a belt tensioner assembly may seem like a daunting task, but with a few simple steps, you can tackle it like a pro:
- Gather the right tools: You’ll need a socket wrench, a pry bar or breaker bar, and some elbow grease!
- Locate the tensioner: It can often be found near the engine’s front, attached to a bracket and a pulley.
- Release the tension: Use the pry bar or breaker bar to release the tension on the belt. This will make removing it much easier.
- Unbolt the tensioner: Using your trusty socket wrench, carefully remove the bolts securing the tensioner to the engine block.
- Replace or repair: Once the tensioner assembly is out, you can either replace it with a new one or have it repaired by a professional.
Question 2: What happens if the timing belt is off by one tooth
Ah, the delicate dance of synchronization! If your timing belt is off by just one tooth, it can throw your engine’s timing off balance, leading to a whole host of issues. Here’s a glimpse into the chaos that can ensue:
- Reduced engine performance: With the timing slightly askew, your engine may not run as smoothly as it should. You might experience reduced power or a jerky ride.
- Engine misfires: A mistimed belt can cause your engine to misfire, creating a shaky and less efficient drive.
- Poor fuel efficiency: When your timing is off, your engine may struggle to burn fuel optimally, resulting in decreased gas mileage.
- Call of the wild: In extreme cases, a severely mistimed belt can cause valves and pistons to collide, leading to bent valves and potentially catastrophic engine damage.
So, if you suspect your timing belt is playing a toothy game of hide-and-seek, consult a professional to avoid any major automotive drama.
Question 3: How much does it cost to fix a timing belt tensioner
Ah, the age-old question: how much will this ordeal cost me? While prices can vary based on several factors such as your vehicle make and model, location, and the mechanic’s rates, you can generally expect to spend anywhere from $200 to $500 to fix a timing belt tensioner.
Keep in mind that this cost usually includes not just the replacement of the tensioner assembly itself, but also the labor involved in getting your beloved vehicle back on the road. So, before you get too worried about your bank account, it’s always best to get a quote from a trusted mechanic.
Question 4: Can you tell if a timing belt needs to be replaced
Ah, the elusive timing belt – a vital automotive component that likes to keep us guessing. So, how can you tell if it’s time to bid farewell to your current timing belt and welcome a fresh one into your engine bay? Here are a few tell-tale signs to watch out for:
- Visible wear and tear: Check your timing belt for any signs of cracking, fraying, or missing teeth. If it’s looking worse for wear, it’s time to consider a replacement.
- High mileage: Most experts recommend replacing your timing belt every 60,000 to 100,000 miles. If your odometer is flirting with those numbers, start planning for a timing belt replacement.
- Engine misbehavior: If you notice your engine misfiring, a loss of power, or a rattling noise coming from the front of your vehicle, it could be a cry for help from your timing belt.
- Graduated from tooth fairy school: If you find random teeth from your timing belt littering your engine bay, it’s safe to say a replacement is long overdue.
In doubt? Consult a qualified mechanic who can give a professional opinion on the current state of your timing belt.
Question 5: Do you need to replace the water pump with a timing belt
Ah, the timeless duo – the timing belt and the water pump. While it’s not an absolute requirement to replace both at the same time, it’s highly recommended. Here’s why:
- Efficiency and convenience: Since the timing belt and the water pump are often in close proximity, it’s more cost-effective and efficient to replace them together during the same repair job.
- Preemptive strike: If your water pump fails after a timing belt replacement, you’ll have to undergo the same labor-intensive process all over again. Save yourself the future frustration by tackling both at once.
- Age and mileage: Typically, if your timing belt is due for replacement due to age or mileage, chances are your water pump has been facing the same wear and tear. Replace them together to ensure smooth sailing for miles to come.
While some may see this as a tempting opportunity to channel their inner gambler, play it safe and opt for the joint replacement for maximum peace of mind.
Removing a belt tensioner assembly doesn’t have to be a mind-boggling mystery. Armed with these essential FAQs, you’re now equipped with the knowledge to tackle this task head-on. Remember, when it comes to your vehicle’s vital components, it’s always best to err on the side of caution and seek professional help when in doubt. So, go forth and conquer that belt tensioner assembly like a true DIY champion!