Are you looking to enhance your TV viewing experience with surround sound? Hooking up surround sound to your Sanyo TV is easier than you might think. Whether you’re planning to use a soundbar or a home theater system, this blog post will guide you through the process step by step.
Many people face the frustration of having no sound coming from their soundbar when connected to their TV. If you’re experiencing this issue, we’ll discuss some troubleshooting tips to help you get the sound working seamlessly on your Sanyo TV.
You may be wondering whether you need an optical cable to connect your soundbar to your Sanyo TV. We’ll explore different connection options and help you understand which one suits your setup the best. Additionally, if you want to connect your phone to your Sanyo soundbar for a personalized audio experience, we’ve got you covered.
So, let’s dive in and discover how to hook up surround sound to your Sanyo TV and create a captivating audio experience like never before.
How to Connect Surround Sound to Your Sanyo TV
So, you finally bought that fancy Sanyo TV of yours and now you’re itching to hook up some thumping surround sound to take your movie nights to a whole new level. Well, my friend, you’ve come to the right place. Buckle up and get ready to dive into the world of audio awesomeness. We’ll show you how to connect surround sound to your Sanyo TV like a pro (or at least pretend to be one).
Check Your TV’s Audio Output Options (What’s That, TV?)
Before you unleash the surround sound symphony, you need to understand your TV’s audio output options. It’s like trying to make a gourmet meal without knowing how to turn on the stove. Trust me, your taste buds will be disappointed. So, let’s check what options your Sanyo TV has to offer.
-
Optical audio output: This sleek little port resembles a ray gun from a sci-fi movie. It’s ideal for connecting to an A/V receiver or soundbar that supports optical input. Look for a square-ish port labeled “Optical Audio Out” on your TV’s backside.
-
HDMI ARC: No, this is not a fancy robot name; it stands for Audio Return Channel. If your TV and sound system support HDMI ARC, this nifty feature allows bidirectional audio communication. Look for an HDMI port labeled “ARC” on your TV—usually HDMI 2 or HDMI 3.
-
3.5mm headphone jack: Yep, the trusty old headphone jack can come to the rescue. Adapters are available to convert this analog output into something your big sound system can handle. You’ll spot a circular port with a headphone icon, a safe bet for connecting external speakers.
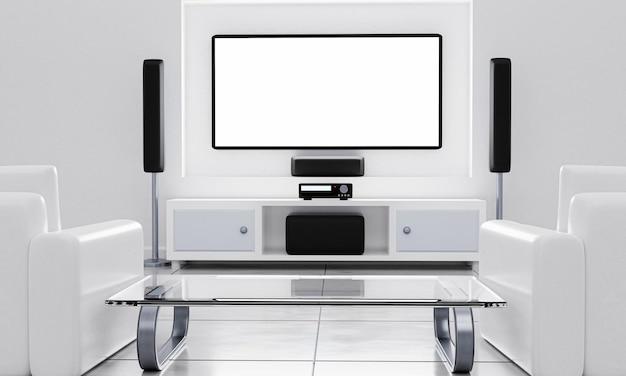
Choose Your Surround Sound System (The Right Fit Matters)
Now that we’ve acquainted ourselves with your TV’s audio output options, it’s time to find the perfect match for surround sound bliss. It’s like dating, but with electronics. Let’s explore a few options.
-
A/V Receiver and Speakers: If you’re looking for the full surround sound experience, an A/V receiver paired with multiple speakers is your best bet. This powerhouse combo will transport you right into the heart of the action, making you feel like you’re dodging bullets in a high-speed car chase.
-
Soundbar: Maybe you prefer a sleeker setup that doesn’t clutter your living room. Enter the soundbar—a long, slim device that packs a punch in a smaller package. It’s like a svelte supermodel, delivering impressive audio while maintaining its minimalist charm.
Connecting the Dots (and Wires)
Congratulations! You’ve chosen your weapons of audio delight, but now comes the challenge of connecting everything together. Fear not, my friend—we’re going to make this as painless as possible.
-
Connecting via Optical Audio: Grab an optical audio cable and plug one end into your TV’s “Optical Audio Out” port and the other into the corresponding port on your A/V receiver or soundbar.
-
Using HDMI ARC: Connect an HDMI cable to the “ARC” port on your TV and the other end to the HDMI ARC input on your A/V receiver or soundbar. Make sure the ARC feature is enabled in your TV’s settings to ensure a smooth connection.
-
Old-School Analog: If you’re using a 3.5mm headphone jack, connect one end of the cable to the headphone jack on your TV and the other end to the audio input on your sound system. Don’t forget to check the TV’s audio settings to ensure the correct output is selected.
Fine-Tuning and Party Time (Popcorn, Anyone?)
Almost there, my friend! Now that you’ve made the connections, it’s time to fine-tune the settings and revel in your surround sound triumph.
-
TV Audio Output: On your Sanyo TV, navigate to the audio settings menu and select the appropriate audio output option—either “Optical,” “HDMI ARC,” or “Headphone/Audio Out.” Make sure you’re sending audio to the correct output you connected earlier.
-
Sound System Settings: Grab that remote control for your A/V receiver or soundbar and tweak the settings to your liking. Adjust the volume levels, enable any audio enhancements (if you dare), and get lost in the immersive audio experience.
Go Forth and Immerse Yourself in Sound Bliss
Congratulations, my audio aficionado! You’ve successfully connected your Sanyo TV to a surround sound system and managed to keep your sanity intact (pun intended). Now sit back, grab some popcorn, and prepare to be blown away by the sonic wonderland you’ve created. Movie nights will never be the same again!
Disclaimer: The information provided is based on current technology standards and Sanyo TV models available in 2023. Specific instructions may vary depending on your TV model and sound system. Always refer to the user manuals for accurate setup instructions.
FAQ: How to Connect Surround Sound to Your Sanyo TV?
As technology continues to advance, one of the most popular ways to enhance your television experience is by connecting surround sound to your Sanyo TV. However, it’s not surprising that you might have a few questions about this process. We’ve gathered the most frequently asked questions to help you navigate the world of surround sound and Sanyo TVs.
Why Is My Soundbar Silent
You’ve invested in a fantastic soundbar, expecting an immersive audio experience, but all you’re getting is silence! Don’t fret, there are a few troubleshooting steps you can take:
- Check the connections: Ensure that your soundbar is properly connected to your Sanyo TV. Verify that the audio cables are securely inserted into the correct ports.
- Adjust audio settings: Access the TV’s audio settings and make sure the audio output is set to the soundbar. You may need to consult your TV’s manual or online resources for specific instructions.
- Test the soundbar: Connect the soundbar to another device, such as a smartphone or tablet, to determine if the issue lies with the TV or the soundbar itself. If the sound works with another device, it’s likely a TV configuration issue.
If none of these steps help, it might be time to consult a technical professional or reach out to Sanyo customer support.
How Can I Get Sound Working on My Sanyo TV
Sometimes, the simplest solutions are the most effective. Here are a few steps you can take to troubleshoot your audio concerns:
- Check the volume: It may sound obvious, but make sure the volume on your TV or soundbar is turned up and not muted.
- Try different audio sources: Verify if the issue is specific to one source. Test audio from a different device, such as a gaming console or DVD player, to see if you can hear sound.
- Restart your devices: Power off both your TV and soundbar, then turn them back on. This simple restart can often resolve minor glitches.
- Update firmware: Ensure that your Sanyo TV’s firmware is up-to-date. Manufacturers occasionally release updates that address audio-related issues.
If these steps don’t solve your audio woes, it’s time to seek additional assistance from Sanyo or a qualified technician.
Do I Need an Optical Cable for My Soundbar
Ah, the optical cable – a topic that generates much confusion. While it’s not a requirement, an optical cable can provide a higher-quality audio connection between your Sanyo TV and soundbar. It enables the transfer of audio in a digital format, resulting in better sound reproduction. However, if your devices support alternative connection methods, such as HDMI or RCA, you can use those without sacrificing audio performance.
Why Won’t My Soundbar Work on My TV
Connecting a soundbar to a TV can sometimes be a bit trickier than expected. If you’re encountering difficulties, try these troubleshooting steps:
- Compatibility check: Ensure that your Sanyo TV and soundbar are compatible and that their connection ports match. Refer to the user manuals or consult the manufacturer’s website for compatibility information.
- Power supply: Confirm that both your TV and soundbar are receiving power. Make sure they are plugged into working outlets and that any power switches are turned on.
- Input selection: Double-check that you’ve selected the correct input source on your TV to correspond with the soundbar connection. It’s easy to overlook this simple step!
If you’re still encountering issues, consider consulting with Sanyo customer support or seeking assistance from a professional audio technician.
How to Connect Surround Sound to Your Sanyo TV
Exciting times lie ahead as you venture into the realm of surround sound! Follow these steps to connect your surround sound system to your Sanyo TV:
- Gather your equipment: Collect your surround sound speakers, AV receiver, HDMI or optical cables, and your Sanyo TV.
- Identify connection ports: Check your TV’s user manual to locate the audio output ports. Common options include HDMI ARC, digital optical, or RCA. Identify the corresponding input ports on your AV receiver.
- Connect the soundbar: Depending on the available connection types, use the appropriate cables to connect your soundbar to the TV or AV receiver.
- Configure audio settings: Access your TV’s settings menu and select the audio output source as the connected soundbar or AV receiver.
- Test the sound: Start playing audio from your TV or another connected device to verify that the sound is correctly outputting through your surround sound system.
With these steps completed, your Sanyo TV will be beautifully paired with your surround sound system, enveloping you in a breathtaking audio experience.
How to Connect Your Phone to Your Sanyo Soundbar
If you’re looking to elevate your music-listening experience by connecting your phone to your Sanyo soundbar, follow these simple steps:
- Check for compatibility: Firstly, ensure that your Sanyo soundbar supports wireless connections and is compatible with your phone’s operating system.
- Enable Bluetooth: Activate the Bluetooth function on your phone. Navigate to the settings menu and locate the Bluetooth option.
- Pair your devices: Put your soundbar into pairing mode, usually triggered by pressing and holding a specific button. Once in pairing mode, select the soundbar from the available Bluetooth devices on your phone.
- Establish connection: Once paired, your phone should display a notification confirming the successful connection. Play music or media on your phone, and the audio will transmit wirelessly to your Sanyo soundbar.
Now you can enjoy your favorite tunes with the superb sound quality of your Sanyo soundbar, all while relishing the convenience of a wireless connection.
Now armed with this comprehensive FAQ guide, you can confidently set up surround sound with your Sanyo TV. Happy listening!