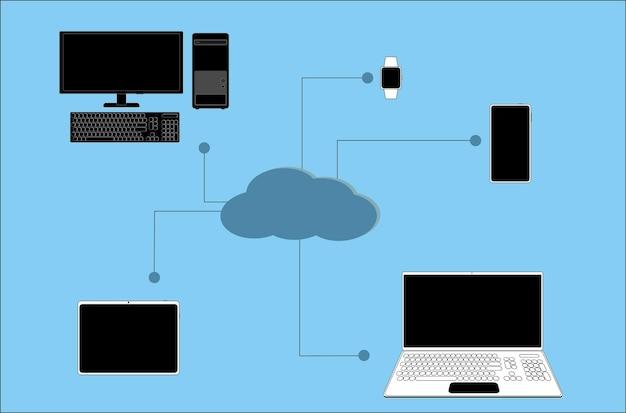
Welcome to the ultimate guide on connecting your WD My Cloud device to the Internet! If you’re new to the world of network-attached storage (NAS), you might have a few questions. How do you access your NAS locally? How can you connect to it remotely? And what’s that USB port on the back for?
In this blog post, we’ll walk you through the step-by-step process of connecting your WD My Cloud to the Internet and exploring its features. Whether you’re looking to transfer files to your computer, find your Discstation, or understand the difference between My Cloud and My Cloud Home, we’ve got you covered. So, let’s dive right in!
Let’s embark on this journey in the year 2023, where we’ll unravel the mysteries surrounding your WD My Cloud and ensure you can make the most of its capabilities. So, grab your cup of coffee, settle in, and let’s get started!

How to Connect Your WD My Cloud to the Internet
So, you’ve got yourself a shiny new WD My Cloud and you’re all set to dive into the world of cloud storage. But hold on a second, how do you actually connect this thing to the internet? Fear not, my friend, because I’m here to guide you through the process with a sprinkle of humor and a dash of American flair. Let’s get your WD My Cloud up and running!
Step 1: Find a Nice Spot for Your WD My Cloud
Before we delve into the nitty-gritty of connecting to the internet, let’s find a cozy little nook for our beloved WD My Cloud. Find a spot in your home where it can sit comfortably and where the Wi-Fi signals flow like a wild river. Remember, this little gadget needs some love, so give it a prime spot (preferably away from unruly pets or mischievous kids).
Step 2: Connect Your WD My Cloud to Power
Now that we’ve found the perfect spot, it’s time to give your WD My Cloud some juice. Take the power cable (yes, the one that magically transforms electricity into pure awesomeness) and plug it into your WD My Cloud. Then, plug the other end into an electrical outlet that’s just itching to bring your cloud storage dreams to life. Voila! Power up, baby!
Step 3: Say Hello to Your Router
Alright, now it’s time to bring out the big guns… or in this case, your trusty router. Locate your router and, with all the confidence of a superhero, connect one end of the Ethernet cable to the back of your WD My Cloud. Now, take a deep breath and feel that surge of power as you connect the other end of the cable to one of the available LAN ports on your router. You’re literally bridging the gap between your WD My Cloud and the internet. How cool is that?
Step 4: Wake Up the WD My Cloud
Your WD My Cloud might be a bit grumpy from its long journey to your doorstep. We need to wake it up and let it know that it’s time to shine. Find the power button (usually a small, inconspicuous button on the front or back of the device) and give it a gentle press. Watch as it comes alive, ready to take on the world and all your storage needs. Give it a pat on the back (figuratively, of course) for a job well done.
Step 5: Connect to the Internet
Ah, the moment of truth has arrived. Take a deep breath and prepare to witness the magic unfold. Grab your laptop, smartphone, or any device with a web browser and connect it to your home Wi-Fi network. Once connected, open the browser of your choice and enter “mycloud.com” in the address bar. This will take you to the WD My Cloud setup page, where you can follow the on-screen instructions to create an account, set up your device, and connect it to the internet. It’s like a digital dance party for your WD My Cloud!
Step 6: Embrace the Cloud Storage Awesomeness
Congratulations, my friend, you’ve successfully connected your WD My Cloud to the internet! Take a moment to bask in the glory of your accomplishment. Now that your WD My Cloud is online, you can upload, download, stream, and access your files from anywhere in the world. It’s like having your own virtual genie, ready to fulfill your storage wishes. So go ahead, embrace the cloud storage awesomeness with a smile on your face and a twinkle in your eye.
And there you have it! Connecting your WD My Cloud to the internet may have seemed like a daunting task, but with a little guidance and a whole lot of humor, you’ve conquered it like a true tech wizard. Now go forth, explore the limitless possibilities of your new cloud storage companion, and let the digital adventures begin!
FAQ: How do I connect my WD My Cloud to the Internet?
What is the default password for Synology NAS
If you’re wondering about the default password for your Synology NAS (Network Attached Storage), fret not! Synology is well-aware of our forgetful nature and has got you covered. The default password for Synology NAS is “password.” Now, don’t go complaining that it’s not the most secure password ever. We highly recommend changing it to something stronger and less guessable as soon as you get your NAS up and running.
How do I access Synology NAS locally
To access your Synology NAS locally, follow these simple steps:
- Fire up your trusty web browser. We recommend avoiding the use of a typewriter for this task.
- Type in the IP address of your Synology NAS. You may find the IP address on your router’s admin page or by using a network scanning tool.
- If you’ve given your NAS a fancy name like “SuperAwesomeCloudStorage,” you might want to try accessing it by typing “http://SuperAwesomeCloudStorage.local” into your browser instead. That should do the trick!
- Press the enter key and voila! You should now be staring at the login page of your Synology NAS. Input your username and password, and you’re all set to dive into the world of local NAS mastery.
How do I connect to Synology remotely
Ah, the joys of remote access! Connecting to your beloved Synology NAS while you’re away from home can be a game-changer. Good news is, it’s as easy as pie. Follow these steps:
- Download and install the DS finder app on your mobile device. It’s available for both iOS and Android, because we believe in equal opportunities for all smartphone users.
- Launch the app and tap on the “Add Synology NAS” button. Well, how else are you going to find your NAS, eh?
- Follow the instructions on the app’s setup wizard. Keep your wits about you because you’ll need the IP address or your QuickConnect ID handy.
- PS: A QuickConnect ID is like a secret alias for your NAS. It makes remote connections a breeze, and just between you and me – it sounds cooler too!
- Once the setup is complete, clap your hands and rejoice! You can now browse your Synology NAS from afar, as if you were right next to it. Technology truly is a marvelous thing.
What is the USB port for on WD My Cloud
Behold, the mighty USB port on your WD My Cloud! You may think it’s there solely for charging unicorns or powering hoverboards, but in reality, its purpose is much more practical. The USB port allows you to connect external storage devices directly to your WD My Cloud. This means you can easily transfer files, create backups, or expand your storage capacity without breaking a sweat. So go ahead, plug in that USB drive and let the data flow!
How do I connect my WD My Cloud to the Internet
Connecting your WD My Cloud to the internet is a piece of cake, provided you follow these instructions:
- First things first, make sure your WD My Cloud is connected to your home network. Plug it into your router using an Ethernet cable. Don’t worry, it won’t bite.
- Power up your WD My Cloud. It needs some juice to work its magic, you know.
- Wait patiently as it boots up. This might be a good time to practice your drumming skills or practice your dog’s favorite tricks.
- Once it’s up and running, open a web browser and type in “http://wdmycloud.local” or “http://wdmycloud.” If you’re feeling extra adventurous, try shouting “WD My Cloud, come out, come out, wherever you are!” But we can’t guarantee it’ll actually help.
- Ta-da! You should now be greeted with the WD My Cloud setup page. Follow the on-screen instructions to complete the setup process, and you’ll have your very own cloud ready to take on the digital world.
How do I transfer files from WD My Cloud to my computer
Transferring files from your WD My Cloud to your computer is as easy as stealing the last slice of pizza when no one’s looking. Just follow these steps:
- Connect your computer to the same network as your WD My Cloud. They may not bond over coffee and cookies, but a stable network connection will do just fine.
- Open your file explorer (or finder if you’re part of the cool Apple club) and navigate to the network section. You should see your WD My Cloud listed there, waiting to be your digital best friend.
- Click on your WD My Cloud’s name. A whole new world of folders and files will appear before your eyes!
- Find the file you want to transfer, right-click on it, and select the “Copy” option. Alternatively, you can use the universally loved keyboard shortcut “Ctrl+C” or “Command+C” for Mac users.
- Navigate to the folder on your computer where you want to place the file. Right-click again and choose “Paste.” You can also input “Ctrl+V” or “Command+V” to make the transfer happen.
- Congratulations, the files have successfully made the journey from your WD My Cloud to your computer! Now go forth and conquer the digital realm like the tech-savvy superhero you are.
What’s the difference between My Cloud and My Cloud Home
Ah, the age-old question of My Cloud versus My Cloud Home. It’s like comparing apples to oranges or trying to explain quantum physics to a cat. But fear not, we’re here to shed some light on this conundrum.
The main difference lies in how they approach storage and accessibility. My Cloud is designed to be directly connected to your network, offering shared storage that can be accessed and managed from multiple devices. It’s like having your own personal cloud right in your home.
On the other hand, My Cloud Home is more focused on simplicity and versatility. It’s designed to be an easy-to-use, plug-and-play solution for personal cloud storage. My Cloud Home seamlessly syncs with your devices and popular cloud services, ensuring your precious files are always at your fingertips.
So, to sum it up:
– My Cloud = Network storage for tech-savvy users craving control and customization.
– My Cloud Home = User-friendly personal cloud storage for the everyday superhero.
How do I find my Discstation
Ah, the elusive Discstation, playing hide-and-seek in the realm of technology. Fear not, intrepid explorer, for we shall guide you on your quest to find it!
- Connect your Discstation to your network. Make sure all the cables are snugly in place, like perfectly fitting puzzle pieces.
- Grab your computer and make sure it’s on the same network as your Discstation. They need to be best buddies, after all.
- Open your favorite web browser, because who doesn’t love browsing the interwebs?
- Type in the IP address of your Discstation. If you’re not sure how to find it, there are a couple of ways to uncover this secret:
- Check your router’s admin page. It often lists all the devices connected to your network, including your Discstation.
- Use a network scanning tool to detect the IP address of your Discstation. It’s like having a digital map to guide you in your search.
- Hit that enter key and prepare yourself for the grand reveal! Your Discstation should now grace your screen, ready to serve you with its delightful storage capabilities.
And there you have it, fellow adventurer! Follow these steps, and you shall find your Discstation, unleashing a world of storage wonders upon you. Safe travels!