Introduction:
Welcome to our comprehensive guide on how to clear a Canon ink absorber and troubleshoot common printer problems. Whether you’re dealing with issues like unrecognized cartridges, wireless connection problems, or a printer that is constantly offline, we’ve got you covered. In this blog post, we’ll explore step-by-step solutions to restore your printer’s functionality and get it back online. We’ll also delve into the concept of the Canon ink absorber, explain its role in printer maintenance, and provide methods to reset your Canon Pixma printer. So, let’s roll up our sleeves and get your Canon printer up and running again!
Keywords: How do I get my Canon printer to recognize refilled cartridges?, Why can’t I get my Canon printer to print wirelessly?, How do I reconnect my Canon printer to WIFI?, Why is my wireless printer offline?, How do I get my Canon printer back online?, How do you clear a Canon ink absorber?, What is Canon ink absorber?, How do I reset my Canon Pixma printer?, What does it mean when Printer Says ink absorber is full?, Why is my Canon Pixma printer not printing?, How do I get my Canon printer to print?, How do I get my HP printer back online?
How to Clear a Canon Ink Absorber
Step-by-Step Guide on Clearing Canon’s Ink Absorber Woes
If you’re a proud owner of a Canon printer, you’ve probably experienced the dreaded “ink absorber full” error message at some point. Don’t worry, we’ve got your back! In this guide, we’ll show you how to tackle this ink-absorbing monster and get your printer back on track. So grab your screwdriver and let’s dive in!
1. Let’s Get to Know the Ink Absorber, shall we
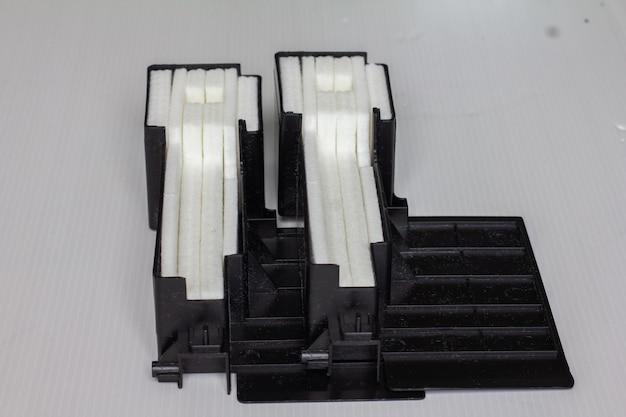
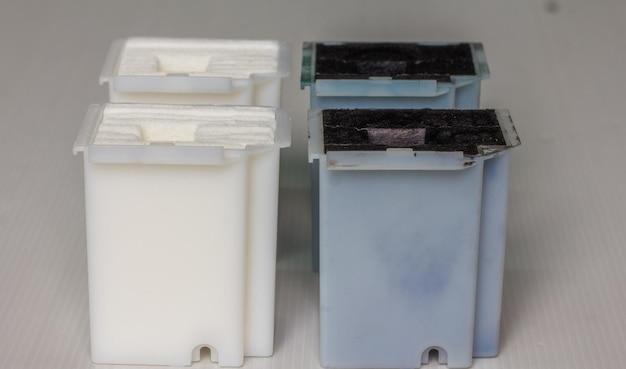
Before we embark on this thrilling adventure, it’s important to understand what an ink absorber actually is. Think of it as your printer’s loyal janitor, working tirelessly to soak up any extra ink during the printing process. Over time, however, this ink-sucking superhero can become saturated, leading to the dreaded error message. But fear not, because you’re about to become the superhero of this story!
2. Safety First – Unplugging and Patience
Before we get our hands dirty, let’s take a moment to ensure our safety. Unplug the printer from any power source and take a deep breath. Clearing the Canon ink absorber will require a bit of time and patience, but trust me, it’s worth it. Plus, a few moments away from your printer could be a much-needed break!
3. The Exciting Journey to Locating the Absorber
Now comes the fun part – locating the ink absorber. The exact location may vary depending on your Canon printer model, so consulting the user manual or visiting Canon’s website can help you find the treasure map you seek. Once you’ve found it, get ready to dive into the belly of the beast!
4. The Great Absorber Removal
Now that we’ve found our ink absorber, let’s remove it. But hang on, before we start unscrewing things like a mad scientist, remember that prying open your printer could void the warranty. So proceed at your own risk, Captain Courageous! Gently detach the absorber from its designated spot and place it on a paper towel. Go ahead, celebrate this small victory with a little victory dance – we won’t judge!
5. Giving the Absorber a Spa Day
With the absorber liberated from its printer prison, it’s time to give it a well-deserved spa day. Run some warm water and gently rinse away the excess ink until the water runs clear. Handle it with care, like you’re washing a priceless work of art. Remember, this absorbent hero has been through a lot while saving your pages from ink stains.
6. Drying and Reassembling – The Boring but Necessary Part
Once you’ve thoroughly rinsed the ink absorber, leave it to dry naturally. It may take some time, so you can use this opportunity to catch up on your favorite TV show or practice your juggling skills. Once it’s dry, carefully place it back into its original spot, making sure everything fits snugly together. Patience is key here, my friend!
7. Celebration Time – Print like There’s No Tomorrow!
Congratulations, printer warrior! You’ve successfully cleared your Canon ink absorber and are ready to unleash a printing spree like never before. Revel in the knowledge that you’ve mastered this task and saved yourself a pretty penny in repairs. Now go forth and print to your heart’s content!
Remember, while clearing the ink absorber may solve the issue temporarily, it’s always a good idea to keep an eye on its capacity and clean it regularly. Prevention is the best cure, after all! So, indulge in some regular maintenance and enjoy stress-free printing for years to come. Cheers to being the hero of your printer story!
FAQ: How do you clear a Canon ink absorber?
If you own a Canon printer, chances are you’ve encountered some ink-related issues along the way. From refilled cartridges not being recognized to wireless printing problems, it can be frustrating when your printer just won’t cooperate. But fear not! In this FAQ-style guide, we’ll answer your burning questions and provide helpful solutions to clear a Canon ink absorber and get your printer back up and running. So, grab a cup of coffee, sit back, and let’s dive in!
How do I get my Canon printer to recognize refilled cartridges
Ah, the age-old battle between printer manufacturers and third-party ink suppliers. While Canon printers are designed to work seamlessly with their own cartridges, they sometimes have trouble recognizing refilled ones. But fret not, we’ve got you covered! Here’s a simple workaround:
- Power on your Canon printer and open the printer cover.
- Remove the refilled cartridges and any other cartridges currently installed.
- Carefully clean the electrical contacts on both the cartridges and the printer using a lint-free cloth lightly dampened with rubbing alcohol.
- Reinstall the cartridges and close the printer cover.
- Restart your printer and give it a moment to recognize the refilled cartridges.
- Voila! Your Canon printer should now happily accept your refilled cartridges.
Why can’t I get my Canon printer to print wirelessly
Ugh, the frustration that comes with a printer that refuses to play nice with your wireless network. But fear not, there’s a light at the end of the tunnel! Here are a few troubleshooting steps to get your Canon printer printing wirelessly again:
- Check that your Canon printer and your computer or mobile device are connected to the same Wi-Fi network.
- Ensure that your wireless router is powered on and functioning properly.
- Restart your Canon printer and wait for it to reconnect to your Wi-Fi network.
- On your computer or mobile device, remove the printer from the list of devices and add it again.
- If all else fails, consult the user manual or visit Canon’s support website for further assistance.
How do I reconnect my Canon printer to WIFI
Ah, the dreaded Wi-Fi disconnect! It happens to the best of us, but luckily reconnecting your Canon printer to Wi-Fi is not as complicated as it may seem. Just follow these easy steps:
- First, power on your Canon printer and make sure it’s in a ready state.
- Using the operation panel, navigate to the printer’s Wi-Fi settings.
- Select the option to connect to a new Wi-Fi network.
- Your printer will search for available networks. Choose your desired network from the list.
- Enter your Wi-Fi password when prompted. Double-check for any typos because those pesky passwords can be sneaky!
- Once you’ve entered the correct password, press the “OK” button.
- Give your printer a moment to establish the connection.
- Ta-da! Your Canon printer is now reconnected to your Wi-Fi network.
Why is my wireless printer offline
Oh, the frustration of an offline printer. It’s like it’s trying to ghost you! But fear not, you can bring it back from the dark depths of offline mode and into the realm of productive printing. Here’s what you can do:
- Double-check that your Canon printer is turned on and properly connected to your Wi-Fi network.
- Make sure there are no physical obstructions or interferences between your printer and the Wi-Fi router.
- Restart your printer and wait for it to reconnect to your network.
- On your computer, navigate to the “Devices and Printers” section.
- Locate your Canon printer and right-click on it.
- Select the option to bring the printer back online.
- Pat yourself on the back because, boom, your wireless printer is back in action!
How do I get my Canon printer back online
You know that feeling when you think your Canon printer is online, but it’s actually hiding in the shadows of offline mode? We’ve all been there. But don’t worry, we’re here to help you bring it back into the glorious realm of being online. Here’s what you can do:
- Check the power and network connections of your Canon printer. Ensure everything is properly connected.
- Confirm that your printer is powered on and ready to rock.
- On your computer, click on the “Start” menu and navigate to the “Devices and Printers” section.
- Look for your Canon printer in the list of available devices.
- If the printer shows up as offline, right-click on it and select the option to bring it back online.
- Give it a few moments to work its magic, and voila! Your Canon printer is back online and ready to fulfill all your printing needs.
What is Canon ink absorber
Ah, the mysterious ink absorber. It sounds like something out of a secret spy movie, but in reality, it’s a vital component of your Canon printer. The ink absorber is a sponge-like pad located inside the printer that absorbs any excess ink during printing and cleaning cycles. Over time, this absorber can become full, leading to issues like ink leakage or error messages. But fear not, there are ways to clear the ink absorber and get your printer back on track!
How do you clear a Canon ink absorber
Clearing a Canon ink absorber requires a delicate touch and a little bit of patience. Here’s a step-by-step guide to help you tackle this ink-stained endeavor:
- Start by turning off your Canon printer and unplugging it from the power source.
- Open the printer cover to access the ink cartridges.
- Gently remove the cartridges from their slots and set them aside.
- Locate the ink absorber pad(s) inside the printer. They’re usually situated near the printer’s carriage.
- Using gloves or tissue paper, carefully remove the ink absorber pad(s) from the printer.
- Rinse the pad(s) under running water until the water runs clear. You can also use a mild soapy solution if needed.
- Squeeze out any excess water and let the pad(s) air dry completely.
- Once the pad(s) are dry, place them back into their designated spots inside the printer.
- Reinstall your ink cartridges, close the printer cover, and plug in your printer.
- Power on your printer and perform a test print to ensure everything is in working order.
How do I reset my Canon Pixma printer
Sometimes, a printer just needs a fresh start. If you’re facing issues with your Canon Pixma printer and suspect that a reset might do the trick, you’re in luck! Here’s how you can reset your Canon Pixma printer:
- Turn off your Canon Pixma printer and unplug it from the power source.
- While keeping the power button pressed, plug the printer back in.
- Continue to hold the power button until the printer powers on completely and the indicator lights stop flashing.
- Once the printer has fully powered on, release the power button.
- Your Canon Pixma printer should now be reset to its factory settings.
What does it mean when Printer Says ink absorber is full
Oh, the dreaded “ink absorber is full” message. Your printer is just trying to tell you that it’s feeling a bit overwhelmed with all that ink it has been soaking up. When the ink absorber pad inside your printer becomes full, it can lead to issues like ink leakage or poor print quality. But fear not, this is a common problem, and you can resolve it by following the steps mentioned earlier to clear the ink absorber.
Why is my Canon Pixma printer not printing
When your Canon Pixma printer refuses to do its primary job of printing, it can be incredibly frustrating. But fear not, we’re here to help you troubleshoot the issue. Here are a few potential culprits and solutions:
- Ensure that your printer has enough paper in the tray. Sometimes, this simple step gets overlooked.
- Double-check that your ink cartridges are properly installed and have enough ink.
- Check if there are any error messages or warning lights on the printer. If so, consult the user manual or Canon’s support website for specific troubleshooting steps.
- Restart your printer and see if that resolves the issue. Sometimes, a good ol’ reboot does wonders.
- If you’re printing wirelessly, ensure that your printer is connected to the correct Wi-Fi network. Reconnecting it to the network might do the trick.
- If all else fails, consider uninstalling and reinstalling the printer software on your computer. Sometimes, software glitches can interfere with the printing process.
How do I get my Canon printer to print
Ah, the joy of printing. Whether it’s an important document or a cute cat meme, getting your Canon printer to print shouldn’t be a hassle. Follow these simple steps, and you’ll be well on your way to bringing your digital creations to life:
- Ensure that your Canon printer is powered on and properly connected to your computer.
- Open the document or image you want to print on your computer.
- From the application’s menu, select the “Print” option.
- In the print settings, choose your Canon printer as the selected device.
- Configure any additional print settings, such as page orientation or paper size.
- Hit that magical “Print” button, and watch as your creation comes to life on paper.
- Pro tip: If your printer seems unresponsive, double-check the printer queue on your computer. Sometimes, a stuck print job can cause delays.
How do I get my HP printer back online
Oops! Looks like your HP printer is playing hide-and-seek with the online world. But worry not, we’ve got your back. Here’s how you can coax your HP printer back online:
- First, ensure that your HP printer is turned on and properly connected to your Wi-Fi network.
- On your computer, navigate to the “Devices and Printers” section.
- Locate your HP printer in the list of available devices.
- If the printer is listed as offline, right-click on it and select the option to bring it back online.
- Give your printer a moment to reconnect to the network, and voila! Your HP printer is back online and ready to tackle all your printing needs.
And there you have it—our comprehensive FAQ-style guide to clearing a Canon ink absorber. We hope you found this information helpful and entertaining. Remember, when ink troubles arise, take a deep breath, follow our troubleshooters, and soon your Canon printer will be purring like a content kitty. Happy printing in 2023!