Have you ever experienced the frustration of trying to start your Honda Shadow only to hear a disappointing click, click, click instead of the revving of the engine? Well, you’re not alone. Many Honda Shadow owners have faced this issue at some point, and the culprit behind this common problem is often a faulty starter motor.
If you’re wondering what causes a starter to stop working or how you can fix it yourself, you’ve come to the right place. In this blog post, we’ll guide you through the process of changing the starter on your Honda Shadow step by step. We’ll also discuss some of the mechanical problems that can occur in a starter motor and the tools you’ll need to get the job done.
So, whether you’re a seasoned DIY enthusiast or just want to save some money on costly repairs, let’s dive in and learn how to change a starter on your Honda Shadow!
Keywords: What causes a starter to stop working? How do you change a starter on a Honda Shadow? Which mechanical problems can occur in a starter motor? Can you fix a starter motor yourself? What tools do you need to remove a starter?

How to Change a Starter on a Honda Shadow
Are you tired of that annoying grinding sound every time you try to start your Honda Shadow? Well, fear not! In this section, I will guide you through the process of changing the starter on your beloved motorcycle. Trust me, you’ll be back on the road in no time, leaving that grinding sound far behind!
Gather Your Tools
Before we dive into the nitty-gritty of starter replacement, let’s make sure you have all the necessary tools at your disposal. You’ll need:
-
Wrench Set: A trusty set of wrenches will come in handy for removing various bolts and nuts.
-
Screwdriver: Grab a Phillips-head screwdriver to tackle any stubborn screws that may be holding the starter in place.
-
Socket Set: Make sure you have an assortment of sockets to fit different bolt sizes.
-
Pliers: A good pair of pliers will be useful for manipulating wires and connectors.
-
Rubber Mallet: Sometimes, a gentle tap is all you need to loosen things up. A rubber mallet will be your best friend in such situations.
Step 1: Preparation
To avoid any mishaps, start by disconnecting the battery. The last thing you want is a surprise shock while working on your bike. Safety first, folks!
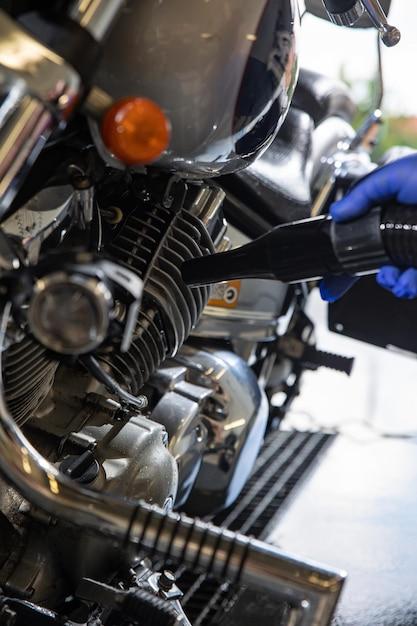
Step 2: Locating the Starter
Now, let’s get down to business. The starter is typically located on the bottom-left side of the engine. It should be fairly easy to spot, like the cherry on top of a sundae. Not that I recommend eating your motorcycle, but you get the idea.
Step 3: Removing the Old Starter
Using your wrench and socket set, carefully remove any bolts connecting the starter to the engine. Keep an eye out for any wires or connectors attached to the starter, as you’ll need to disconnect those as well. Remember, patience is key here. If you start feeling frustrated, take a deep breath and imagine yourself cruising on your newly repaired bike. It helps, trust me.
Step 4: Installing the New Starter
Now comes the fun part! Take your shiny new starter and carefully position it in place. Double-check that all the wires and connectors are properly aligned. Then, using your trusty wrench and socket set, secure the starter in place by tightening the bolts. But don’t go overboard, or you’ll end up with a stripped bolt. And let’s be honest, stripped bolts are never a good look.
Step 5: Reconnecting the Battery
You’re almost done! Reconnect the battery and make sure all the wires are securely attached. It’s like connecting the dots, but with more sparks (figuratively speaking, of course).
And voilà! You’ve successfully replaced the starter on your Honda Shadow. Take a moment to pat yourself on the back and bask in the glory of your mechanical prowess. Now go out there and enjoy the smooth, hassle-free starts that await you. Until the next adventure, my motorcycling friend!
Note: The information provided here is based on general knowledge and may vary depending on the specific model of your Honda Shadow. If you’re unsure or uncomfortable with any step of the process, it’s always a good idea to consult the owner’s manual or seek professional assistance. Safety first, remember?
FAQ: How to Change a Starter on a Honda Shadow
What Causes a Starter to Stop Working
A starter motor can stop working due to various reasons. Some common causes include electrical issues, worn-out components, excessive heat, and mechanical failures. Over time, the starter motor’s brushes and solenoid contacts can wear out, leading to reduced performance or complete failure. Electrical problems, such as a faulty ignition switch or a weak battery, can also interfere with the starter motor’s functionality. It’s essential to diagnose the exact cause of the starter failure before proceeding with any repairs.
How Do You Change a Starter on a Honda Shadow
Changing a starter on a Honda Shadow may sound like a daunting task, but with the right approach, it is actually manageable. Here are the steps to follow:
Step 1: Prepare the motorcycle
Before diving into the starter replacement process, make sure to turn off the engine, disconnect the battery, and place the bike on a stable surface. Safety always comes first!
Step 2: Locate and access the starter motor
The starter motor is usually positioned near the engine, usually on the side or underneath. Consult your Honda Shadow’s owner’s manual or online resources to determine the exact location of the starter motor.
Step 3: Disconnect the starter electrical connections
Carefully detach the electrical connections attached to the starter motor. These connections may include wires and plugs. Take note of their positions to facilitate reinstallation later.
Step 4: Remove the starter motor
Using the appropriate tools, loosen and remove the bolts securing the starter motor to the engine. Gently disconnect any remaining components, freeing the starter motor from the Honda Shadow.
Step 5: Install the new starter motor
Take the new starter motor and align it properly to fit into the designated space. Reinstall any components that were disconnected in the previous step. Secure the starter motor in place by tightening the bolts according to the manufacturer’s specifications.
Step 6: Reconnect the electrical connections
Carefully reconnect all the electrical connections, ensuring they are properly attached and secure. Double-check the connections to guarantee a solid and reliable connection.
Step 7: Test the new starter motor
Before considering the job done, reconnect the battery, turn on the ignition, and start the Honda Shadow. If the replacement was successful, the starter motor should engage smoothly, allowing the engine to start effortlessly.
Which Mechanical Problems Can Occur in a Starter Motor
While starter motors are generally quite reliable, they can experience mechanical problems that hinder their performance. These issues can include worn-out brushes, a faulty solenoid, a damaged armature, or a worn-out gear train. Additionally, excessive heat caused by prolonged cranking or poor ventilation can result in internal damage to the starter motor. Regular maintenance and inspections can help detect these mechanical problems early on and prevent more severe issues.
Can You Fix a Starter Motor Yourself
Fixing a starter motor yourself is possible, but it requires a certain level of mechanical knowledge and the right tools. Due to the technical nature of the task, it’s recommended to have prior experience with automotive repairs or seek guidance from a qualified professional. If you possess the necessary skills and feel confident in your abilities, you can attempt to diagnose and repair minor issues such as worn brushes or solenoids. However, for more complex problems, it’s best to rely on the expertise of a professional mechanic.
What Tools Do You Need to Remove a Starter
To remove a starter from a Honda Shadow, you’ll need the following tools:
- Socket set: A socket set with appropriate socket sizes for the bolts securing the starter motor.
- Wrenches: Combination wrenches for loosening and tightening various components.
- Screwdrivers: Both flathead and Phillips head screwdrivers for removing screws and connectors.
- Pliers: Pliers can be helpful for disconnecting electrical connections and manipulating wires.
- Torque wrench: A torque wrench ensures that bolts are tightened to the manufacturer’s specifications.
Having these tools readily available will make the starter removal process more efficient and ensure that you have what you need to complete the job correctly.
Now that you have a better understanding of replacing a starter on a Honda Shadow, you can confidently tackle this task when the need arises. However, if you’re unsure about any step or lack the necessary tools, it’s always wise to consult a professional to avoid any costly mistakes. Happy riding!