Have you ever found yourself with a rubber bracelet that just doesn’t fit? Maybe it’s a wristband from a concert or a cause you support, but it’s simply too loose for your wrist. Well, fear not! In this blog post, we’re going to dive deep into the question: Can you shrink a rubber bracelet?
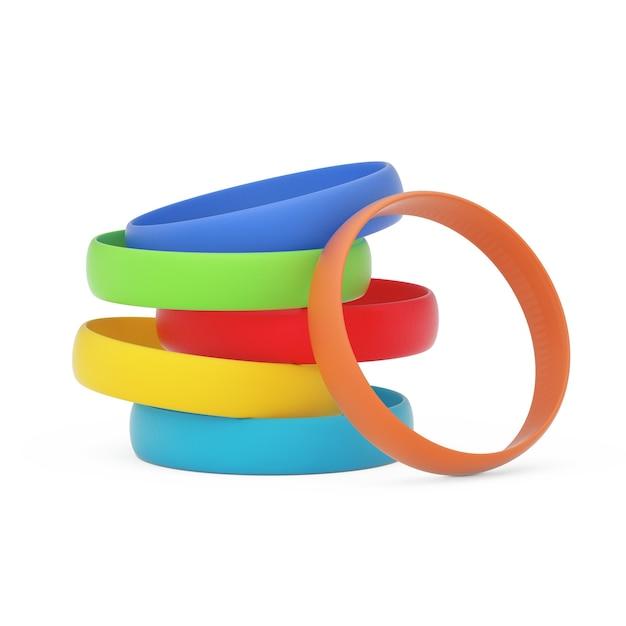
Rubber bracelets, also known as silicone wristbands, have become incredibly popular over the years. They’re not only fashionable but also serve as a way to show support for various causes or commemorate special events. But what if you find yourself with a bracelet that’s too big? Can you make it smaller? Today, we’re going to explore different methods and techniques that might just help you achieve that perfect fit.
In this comprehensive guide, we’ll discuss various methods that people have tried to shrink rubber bracelets. From using heat to chemical solutions, we’ll explore the effectiveness and safety of each method. So, if you’re curious about how to resize your rubber bracelet and want to avoid the disappointment of wearing a loose fitting wristband, keep reading! But first, let’s uncover the answer to this burning question: Can you shrink a rubber bracelet?
Can you Shrink a Rubber Bracelet?
Rubber Bracelet Shrinking: Myth or Reality
Rubber bracelets have become a popular fashion accessory over the past few years. They come in various colors, designs, and sizes, adding a touch of flair to any outfit. But what happens when you get a rubber bracelet that’s too big for your wrist? Can you shrink it down to size? Let’s dive into the world of rubber bracelet shrinking and find out if it’s a myth or a reality.
The Hot Water Method: Hold on Tight!
One method that is often suggested for shrinking rubber bracelets is the hot water method. The idea is to expose the bracelet to hot water to soften the rubber and then stretch it to the desired size. While this may sound like a simple solution, it’s important to proceed with caution.
The Science: Rubber Band Magic
Rubber has a property called “elasticity,” which allows it to stretch and return to its original form. When exposed to heat, the rubber molecules become more flexible, making it easier to manipulate. However, it’s worth noting that rubber bands and bracelets are made from different types of rubber, so results may vary.
Step-by-Step Guide: Handle with Care
If you decide to try the hot water method, here’s a step-by-step guide to help you through the process:
-
Boil water in a pot: Fill a pot with enough water to submerge the bracelet completely. Bring the water to a boil and then remove it from the heat source.
-
Carefully place the bracelet: Use a pair of tongs to dip the bracelet into the hot (not boiling) water. Be cautious not to burn yourself in the process.
-
Let it soak: Allow the bracelet to soak in the hot water for a few minutes. This will help soften the rubber and make it more pliable.
-
Remove and stretch: Take the bracelet out of the water using tongs and gently stretch it to the desired size. Be cautious not to overstretch or damage the bracelet.
-
Cool it down: Once you’ve achieved the desired size, let the bracelet cool down completely. You can place it in cold water or simply let it air dry.
The Verdict: Proceed with Caution!
While the hot water method may work for some, it’s not a guaranteed solution. The results can vary depending on the type of rubber used in the bracelet and the level of heat exposure. Additionally, excessive stretching or exposure to high temperatures can damage or weaken the bracelet. So, proceed with caution and consider alternative options such as visiting a professional jeweler or exchanging the bracelet for a smaller size.
Next time you find yourself with a rubber bracelet that’s too big, remember that while shrinking it may be possible, it’s not always the best idea. Exploring alternative options can save you time, effort, and the risk of ruining your beloved accessory. Stay stylish and keep rocking those rubber bracelets, no matter the size!
FAQ: Can you shrink a rubber bracelet?
Can you shrink a rubber bracelet
Yes, you can definitely shrink a rubber bracelet! It’s like performing a mini-magic trick on your wrist. But don’t worry, you don’t need a wizard’s hat or a wand for this enchanting endeavor. All you need are a few everyday items and a sprinkle of patience. So get ready to transform your oversized rubber bracelet into a perfectly snug accessory!
First, let’s gather our materials:
- Oversized rubber bracelet
- Boiling water
- Cotton swab
Now, here’s the step-by-step guide to shrink your rubber bracelet:
-
Boil some water: Fill a pot with water and bring it to a rolling boil. Make sure you have enough water to fully submerge your rubber bracelet.
-
Prepare the bracelet: While the water is heating up, slip your rubber bracelet onto your wrist and take note of how much it needs to shrink. This will help you determine how long to keep it in the boiling water.
-
Dive into the boiling water: Carefully lower your bracelet into the pot of boiling water. Let it simmer there for about 30 seconds to a minute, depending on how much shrinkage you desire. Remember, patience is key here!
-
Fish it out: After the designated time has passed, use a pair of tongs or a slotted spoon to retrieve your bracelet from the hot water. Be careful not to burn yourself! Let it cool for a few moments.
-
Dry it off: Once the bracelet has cooled down a bit, take a cotton swab and gently dry it off. You don’t want any excess water ruining your perfectly shrunk bracelet moment.
-
Try it on: Brace yourself, it’s the moment of truth! Slip the bracelet back onto your wrist and admire the results. It should fit snugly, as if it were custom-made just for you.
How long does it take to make a rubber band ball
Ah, the rubber band ball—a mesmerizing creation that brings out the inner child in all of us. But how long does it take to craft this bouncy sphere of joy? Well, that depends on a few factors, such as your dedication, rubber band supply, and, of course, your finger dexterity.
Here’s a rough estimate of the time it might take to make a rubber band ball:
-
Beginner level: If you’re new to the rubber band ball game, expect to spend a couple of hours on your creation. After all, you’ll be getting a hang of the rolling and wrapping technique. You might even encounter a few rubber band snap mishaps along the way.
-
Intermediate level: Once you’ve mastered the art of rolling and wrapping, you’ll find yourself gaining speed. At this level, it might take you anywhere from a few hours to a day to complete your rubber band ball, depending on its size. You’ll be in a zen-like state, fully immersed in the rhythmic motion of adding one rubber band after another.
-
Advanced level: If you’re a rubber band ball aficionado, you’re a force to be reckoned with! You’ll have the finesse and skill to whip up a sizable rubber band ball in no time. In a matter of hours, or maybe even less, you’ll have your rubber band ball ready to bounce its way into the world.
Remember, making a rubber band ball is not just about the end result—it’s also about enjoying the journey. So put on some upbeat music, flex those fingers, and let the rubber band ball magic unfold!
How do you make a knot with two rubber bands
Oh, the wonders of rubber bands! These versatile little elastic marvels can do more than just hold things together and give you a fashionable wrist accessory. They can also perform knot-tying tricks that will leave your friends in awe.
Here’s a step-by-step guide to tying a knot with two rubber bands:
-
Choose your champion: Select two rubber bands of different colors. The contrasting colors will make the knot more visually appealing and showcase your knot-tying prowess.
-
Cross and tuck: Hold one rubber band in your left hand and the other in your right hand. Cross the two rubber bands over each other, creating an “X” shape. Now, take the rubber band in your left hand and tuck it under the one in your right hand.
-
Pull and loop: It’s time to work some rubber band magic! Hold the ends of the rubber band in your right hand and gently pull it upwards. As you do this, you’ll notice the crossed section in the middle start to loop and twist. Keep pulling until the loop is snug and secure.
-
The final flourish: Congrats, you’ve successfully tied a knot with two rubber bands! Gently adjust the knot, making sure it’s centered and aesthetically pleasing. Give it a playful tug to see the knot hold its ground.
Now you’re armed with the knowledge to impress your friends with your rubber band knot prowess. Whether you want to add a touch of flair to your craft projects or simply enjoy the satisfaction of conquering the rubber band knotting world, this skill is bound to come in handy.
Where is the world’s largest spoon
Prepare to have your mind (and appetite) blown! The world’s largest spoon can be found in the charming city of Chapel Hill, North Carolina, USA. It’s a place where culinary dreams and oversized utensils collide in a whimsical display of creativity.
This monumental spoon, aptly named “Spoonbridge and Cherry,” takes center stage at the North Carolina Museum of Art. Designed by the renowned artists Claes Oldenburg and Coosje van Bruggen, this colossal stainless steel spoon stretches an impressive 52 feet long. But wait, there’s more—it’s not just a spoon. This giant utensil supports a vibrant cherry perched on top, adding a delightful splash of color to the scenery.
Lovers of art and food alike flock to this iconic spoon to marvel at its sheer size and whimsical presence. It’s the perfect spot for a photo op that will leave your friends wondering if you’ve stumbled into a surreal world where utensils come to life.
So, if you find yourself in Chapel Hill, head over to the North Carolina Museum of Art and witness the majesty of the world’s largest spoon. It’s an experience that will stir your imagination and leave you with a hankering for some oversized cherries.